How to Disassemble & Clean An AR 15 Rifle
Complete Disassembly (Field Strip), Cleaning, Lubrication and Reassembly of an AR-15 Rifle
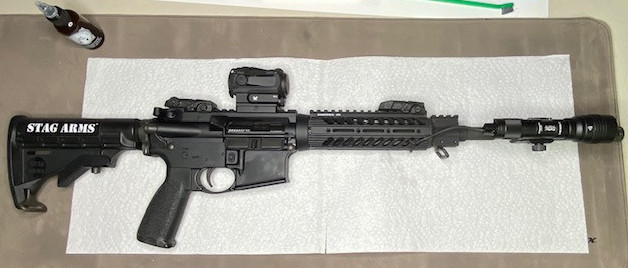
AR-15 Platform rifles are actually simple to take apart. After you do it once or twice, you will see that it is not difficult to field strip and clean the parts. You will only need a few basic tools and supplies to keep it running smoothly for years to come.
Here are Step-by-Step Instructions on how to breakdown, clean, lube and reassemble a Stag Arms Model Stag 15 AR 15 rifle
This article will show in detail how to field strip, disassemble, clean, lubricate and reassemble an AR-15 rifle. This will be demonstrated using a Stag Arms Model: Stag 15 in 5.56 or .223 caliber. This procedure is the same for AR-15 rifles from Bushmaster, Smith & Wesson M&P, Stag Arms, Springfield, Ruger, Daniel Defense, PSA (Palmetto State Armory), etc.
**All AR-15 platform rifles are basically the same as far as how they are disassembled and cleaned.
I will also show in detail how to disassemble, lubricate and reassemble the bolt carrier group (BCG).
___________________________________________
Here is the CALIBER DEBATE VIDEO:
____________________________________________
Supplies & Tools Needed to Disassemble, Clean & Lubricate an AR 15 Rifle
The AR-15 does not require much in the way of tools to field strip for cleaning purposes. You may need a small punch or screwdriver to remove the extractor and ejector on the Bolt, but that is about it.
Here are the items you’re going to need to clean your AR-15:
A basic gun cleaning kit for rifles should have most everything you will need, but here is a list to be sure:
Otis Complete Kit for AR-15 Cleaning
Original Gun Oil: This is my recommended cleaner, Lube and Protectant. See my review here. Save 10% and FREE shipping with code SAVEWITHDAVE
- Rod & Patches for AR-15 or Rifle Bore snake
- Real Avid AR15 BCG Cleaning Tool
- A good gun brush or some cheap toothbrushes
- Gun Oil
- A gun punch kit for some of the more intricate disassembly
- Pipe cleaners
- Cotton or foam Swabs
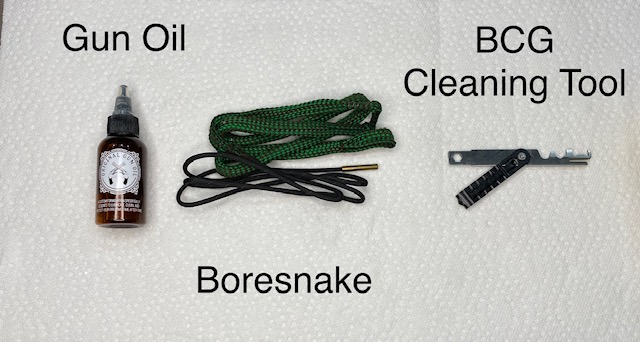
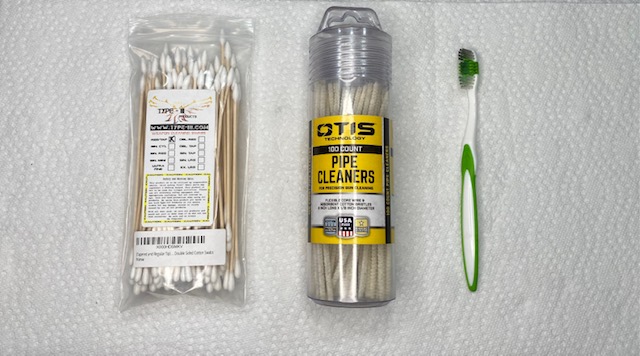
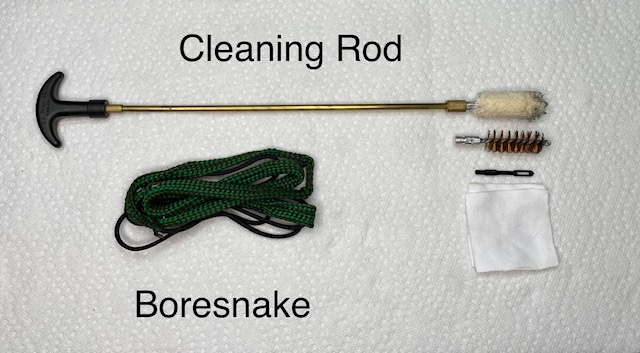
Some recommended cleaners:
- Birchwood Casey Gun Scrubber (you can spray your separate components clean. It is quick and does a great job but it’s pretty messy)
- Hoppes No. 9 solvent
- Slip 2000 Heavy Duty Oil
AR-15 Field Strip (Disassembly), Cleaning, Lubrication and Reassembly Steps
Here is a list of the steps, with detailed pictures below. Here are the steps:
- Unload your AR-15
- Remove the Upper Receiver from the Lower Receiver
- Remove the Bolt Carrier Group from the Upper Receiver
- Disassemble the Bolt Carrier Group
- Clean all parts
- Lubricate the Bolt Carrier Group & Lower Receiver
- Reassemble the Bolt Carrier Group
- Re-install the BCG into the Upper
- Reassemble the Upper Receiver to the Lower Receiver
Unload the AR-15
The most important step is to begin with an unloaded rifle. A quick few seconds of cheap insurance to keep you safe.
Ensure the magazine has been removed first, then open the action to verify there is no round in the chamber.
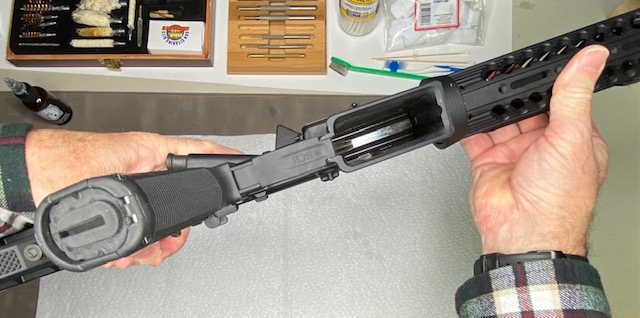
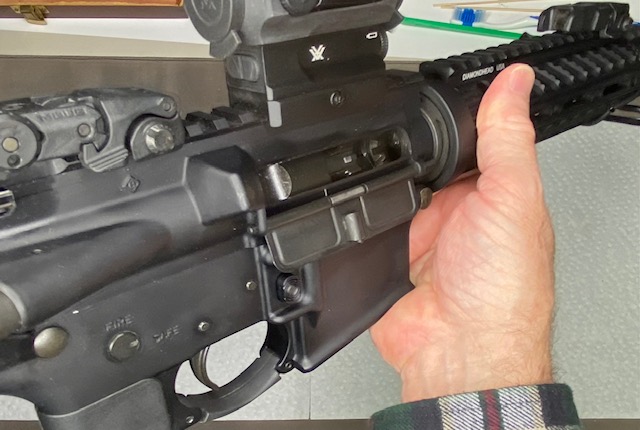
**In the next step, you will be pressing the trigger in order to release the tension on the hammer. If you have any doubt whatsoever that your rifle is completely unloaded, check it again!!!
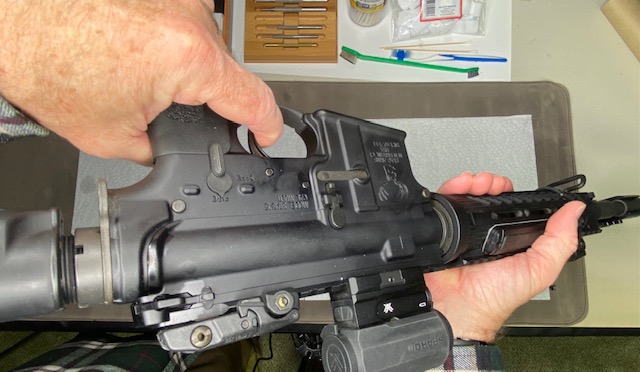
Remove the Upper Receiver from the Lower Receiver
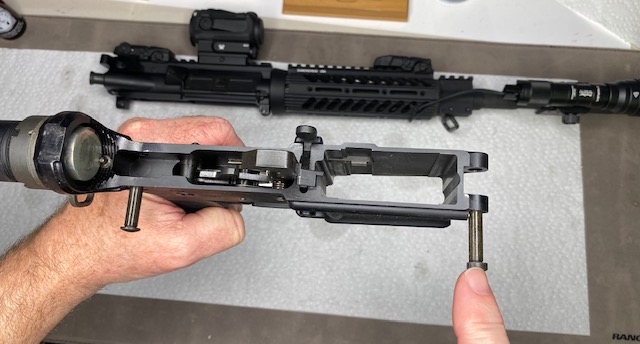
The AR-15 platform is designed to be easy to take apart. The first step is to separate the Upper Receiver from the Lower Receiver (also referred to in this article as the “Upper” or “Lower”). This can be easily accomplished simply by pressing the two take-down pins on one side and pulling them out on the other side one at a time, as demonstrated in the pictures below.
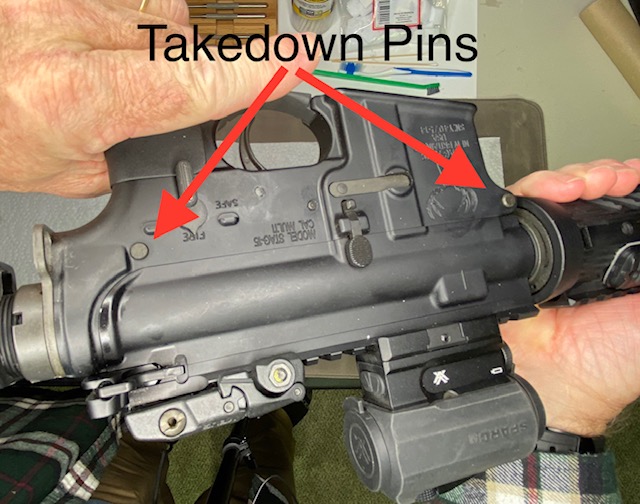
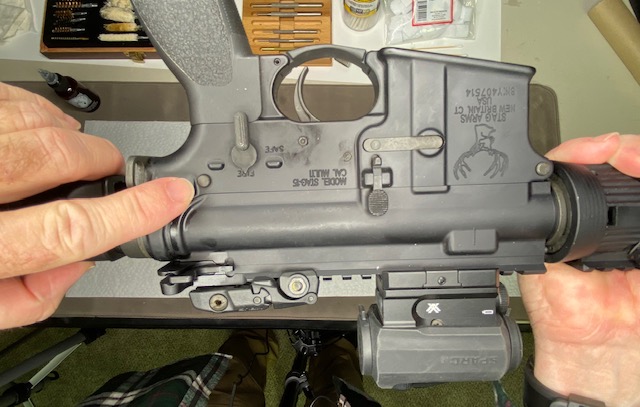
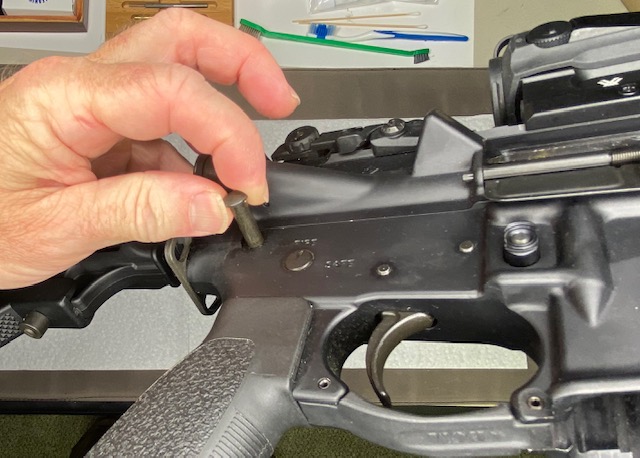
The take-down pins will not come all the way out, but be sure to pull them out as far as they will go.
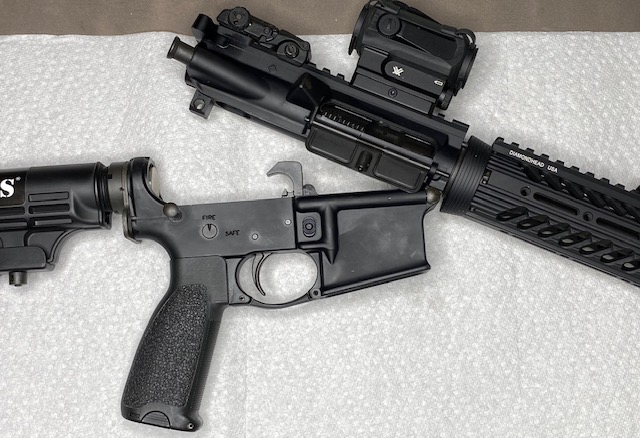
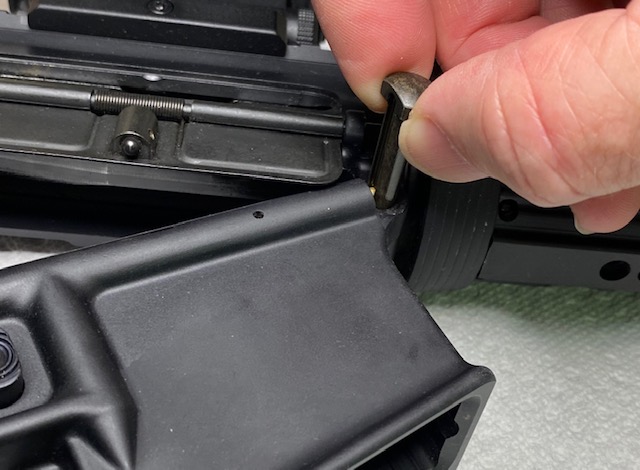

Removal of the Bolt Carrier Group from the AR-15 Upper Receiver
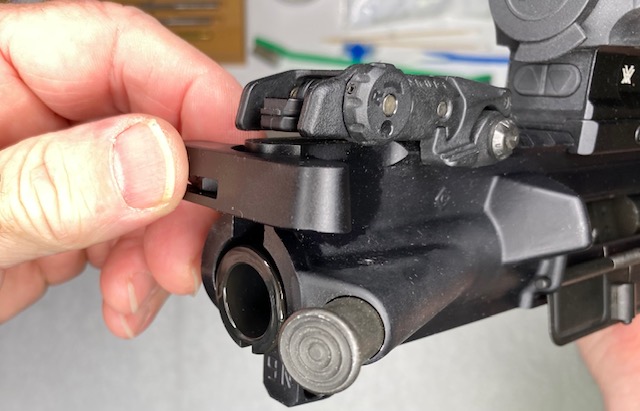
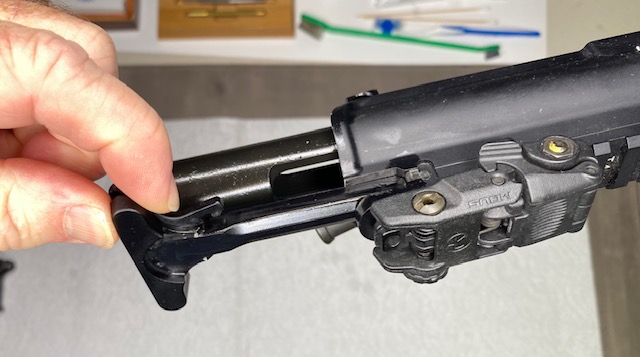
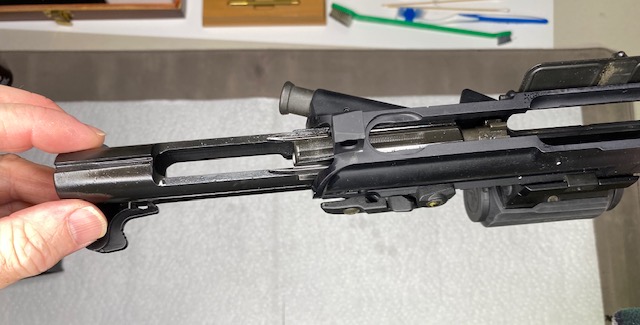
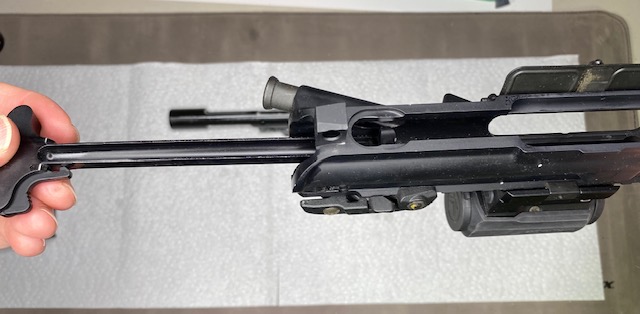
Next, we will remove the bolt carrier group and Charging Handle from the Upper. These will pull out from the back of the upper quite easily. Simply press the lever on the charging handle and carefully pull it to the rear. This will pull the bolt carrier group along with it. As soon as the BCG is out far enough, grab hold of it with your fingers and remove it the rest of the way. the charging handle will then need to be lifted slightly out of its notch to be removed.
Disassemble the Bolt Carrier Group
For more detail on this procedure, see How to Disassemble an AR-15 BCG (Bolt Carrier Group)
The Bolt Carrier Group is where a lot of malfunctions can happen. It is an important part to disassemble and clean on a regular basis.
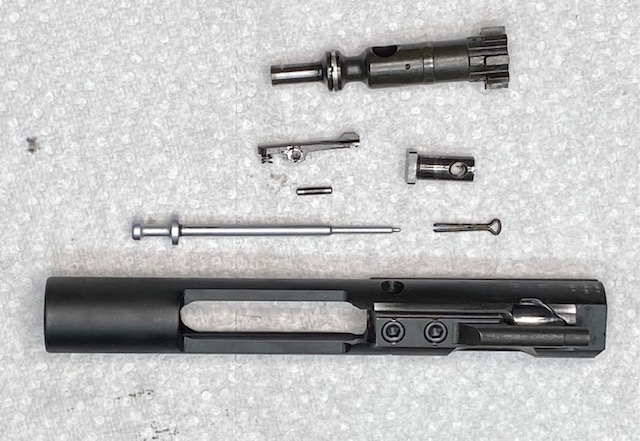
First, pull out the firing pin retainer. This is basically a cotter pin that can be easily removed with a small pointed object. A small punch or even a cotton swab stick will work
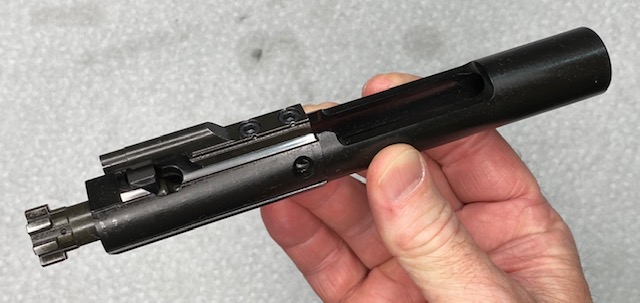
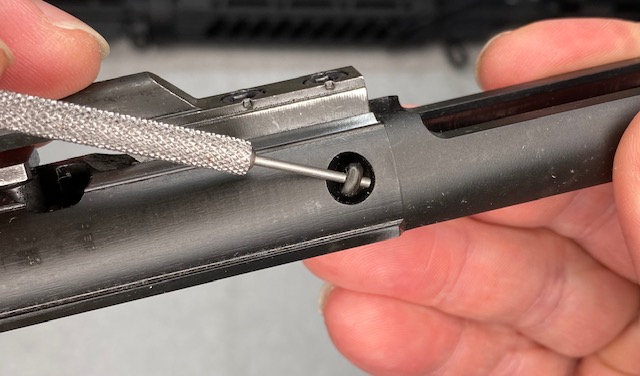
Once the retaining pin is removed, the firing pin will drop out. You may need to shake the bolt carrier a bit, but it will come out.
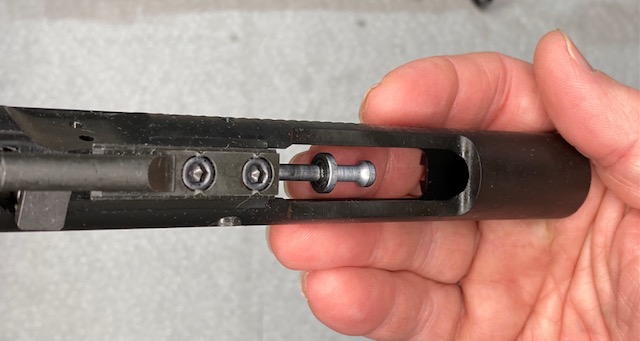
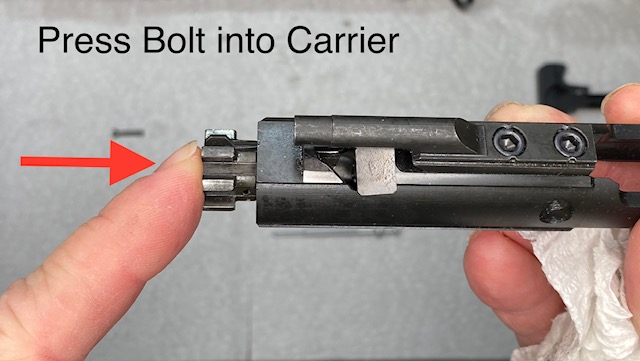
To remove the bolt from the carrier, press the bolt all the way into the carrier. This will allow you to get to the cam pin. Turn the cam pin 90 degrees and then you can pull it out of the carrier. Once this is removed, you can pull the bolt out of the end of the carrier.
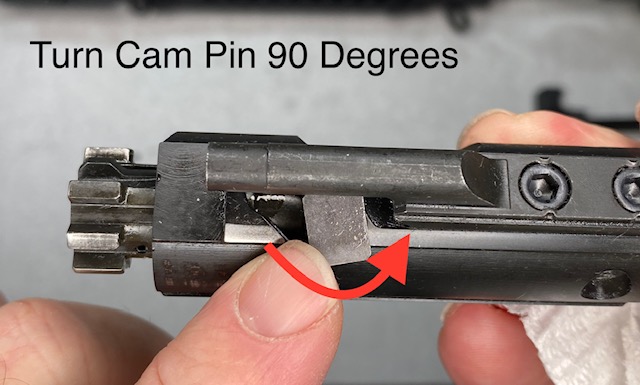
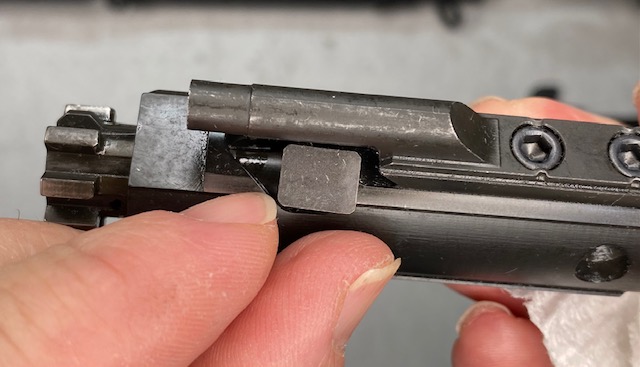
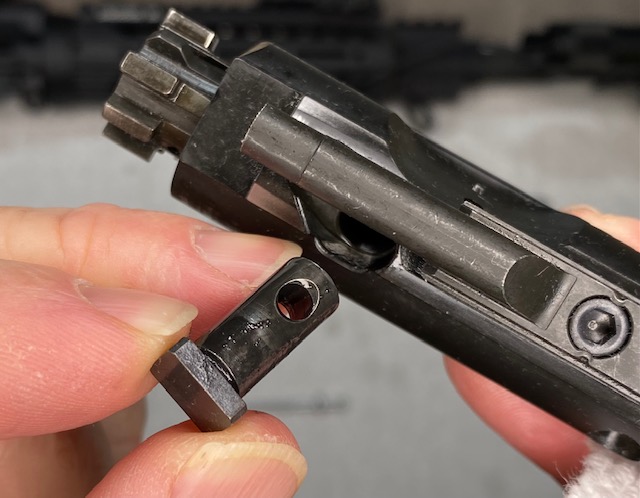
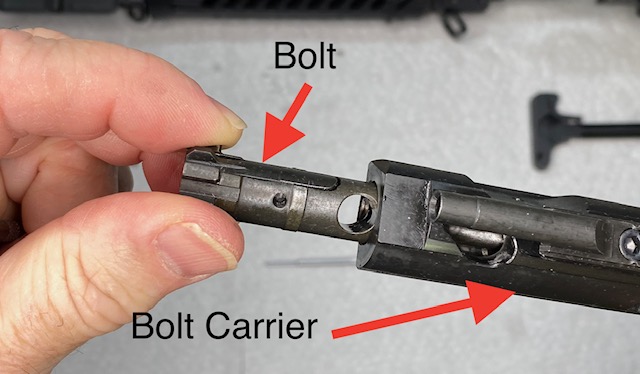
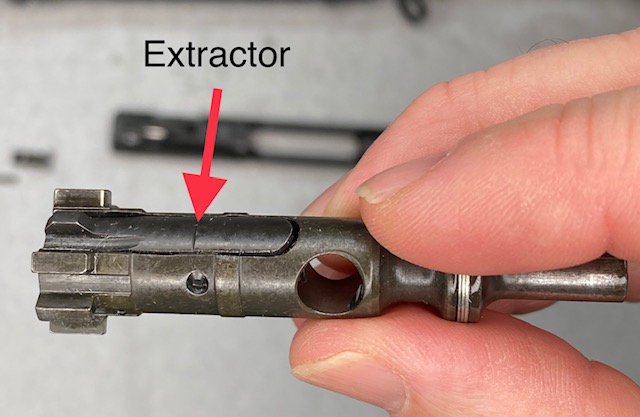
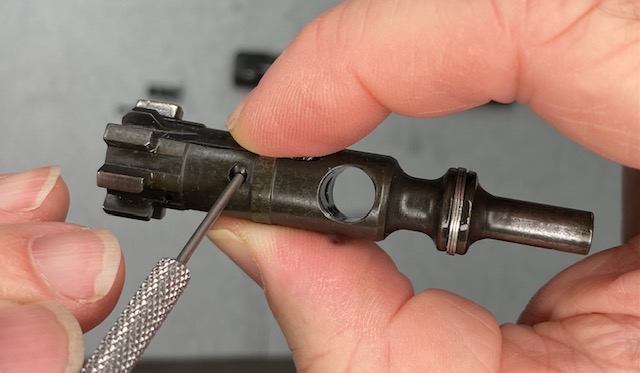
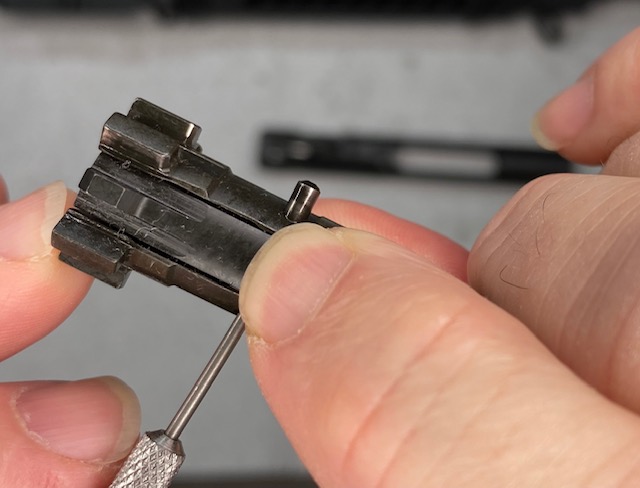
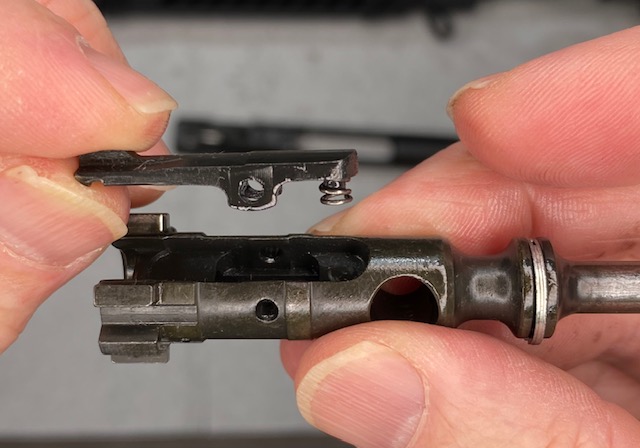
The extractor is the next part to remove. It is held in with an easy to remove pin. Pinch the bolt with one finger directly over the pin as shown in the pictures below. while squeezing the bolt, push out the pin with a small punch or screwdriver.
Clean all parts
Using the method of your choice you can now clean all the parts that have been disassembled. I use Original Gun Oil which is a C.L.P. (cleaner, lubricant and protectant) to coat all the parts, wait a few minutes and then wipe them all clean. I use gun brushes, cotton cloths, pipe cleaners and swabs to get everything clean.
Clean the following parts:
- All bolt carrier components
- Charging Handle
- Fire control components in the Lower
- Chamber & Inside the barrel
Optionally, you can use any good solvent or for a quick clean, use Birchwood Casey Gun Scrubber and spray the parts clean! This is messy so I usually hold the parts over a trash can and let the dirt and grime drip right into the can.
The upper and lower can be cleaned using brushes and swabs. The inside of the barrel is cleaned using either a Rod & Patches or a Boresnake.
See the video for details on how I clean the various parts of the AR-15.
Video: Disassembling, Cleaning, Lubricating and Reassembling an AR-15
Lubricate the Bolt Carrier Group
Use a quality lubricant such as Original Gun Oil to lube your AR-15. I prefer this product due to the fact that it is non-toxic and has no odor. I do not need to worry about getting it on my skin and I can lubricate my guns in the house without harsh odors.
___________________________________________________
Here is the CALIBER DEBATE VIDEO:
____________________________________________________
Apply lubricant to the parts as shown below before you reassemble the Bolt. Alternatively, you can lube the parts as you put them together if you prefer to do it that way.
The amount of oil I recommend is just a guideline. you do not want to over-oil your AR-15 as too much oil will collect dirt and grime which can build up and cause malfunctions over time. If you clean your AR-15 often, this will not be a problem. If you use too little oil, your rifle may malfunction under heavy use as well. I would say it is better to use too much than too little.
Oil the following parts:
- Firing Pin
- Gas rings
- Bolt body
- Cam Pin
- Firing Pin Retainer
- Charging Handle
- Rails of Bolt Carrier
- Exterior of bolt Carrier
- Lower Receiver Trigger Pin
- Lower Receiver Hammer Pin
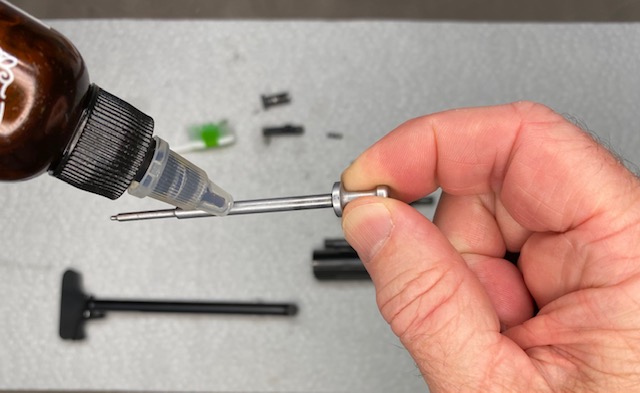
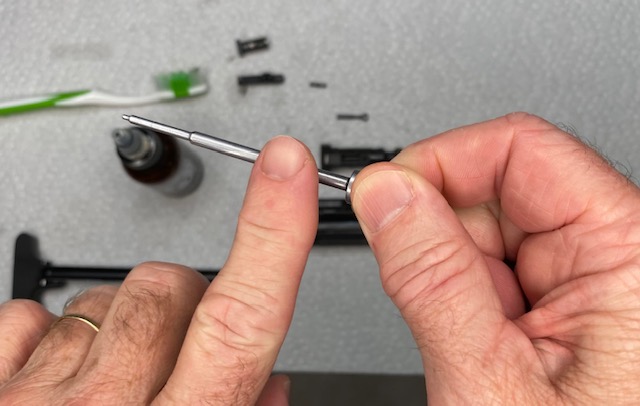
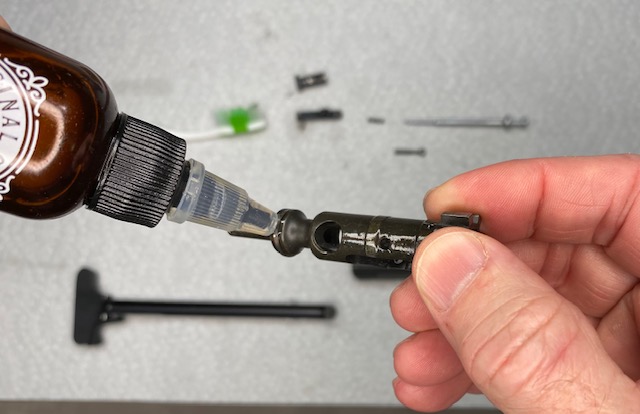
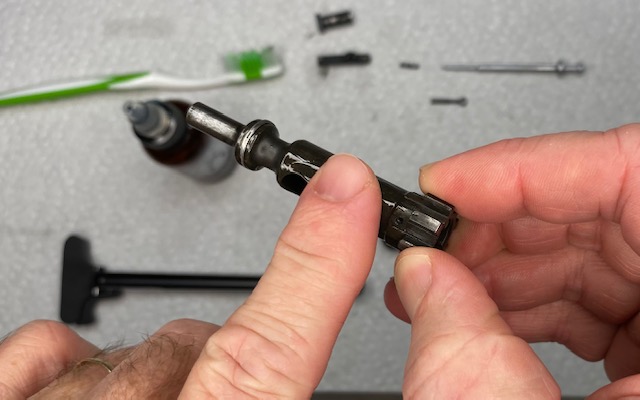
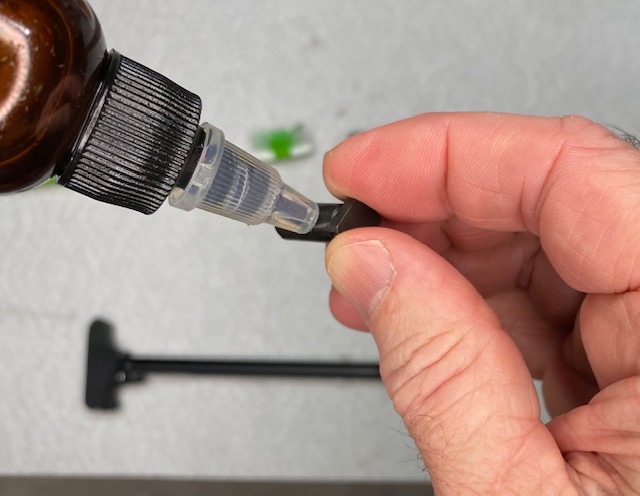
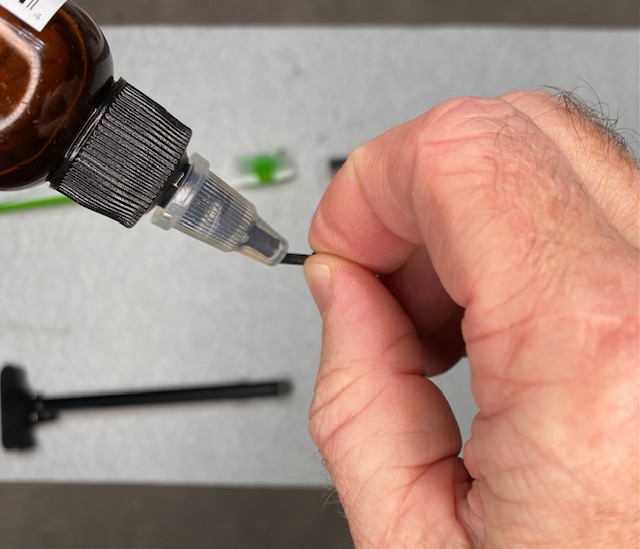
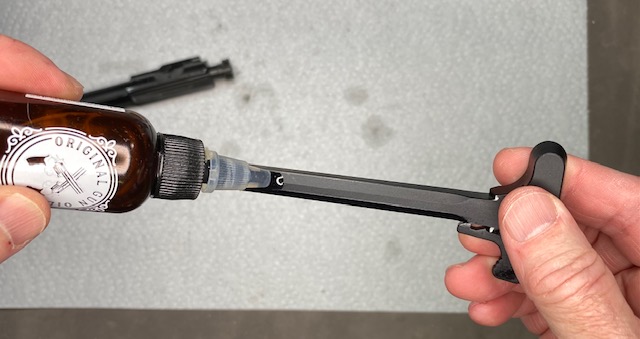
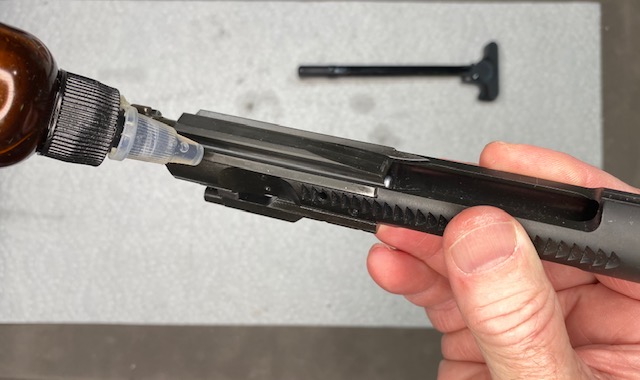
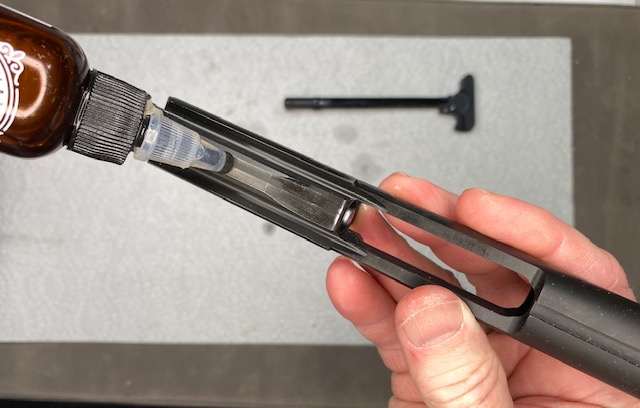
Next we want to lubricate the AR-15 Lower. You only need a drop of oil on each of the two pins in the lower, the Hammer Pin and Trigger Pin.
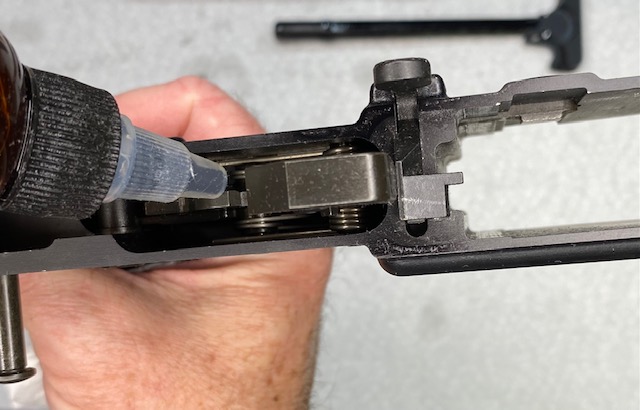
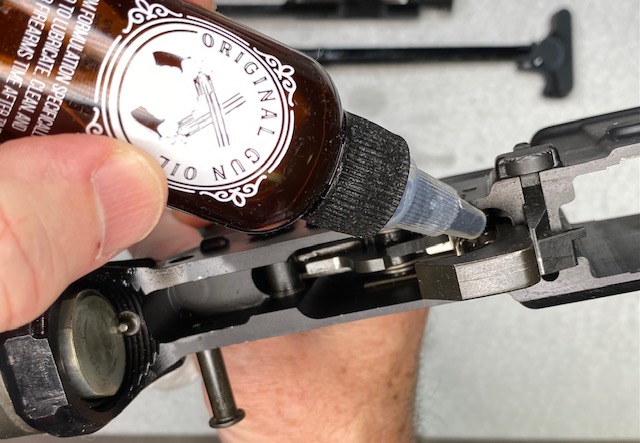
Once the lubrication is complete on the Bolt Carrier Group, we can reassemble it. You can also lubricate each piece before it is assembled if that is easier for you.
Reassemble the Bolt Carrier Group
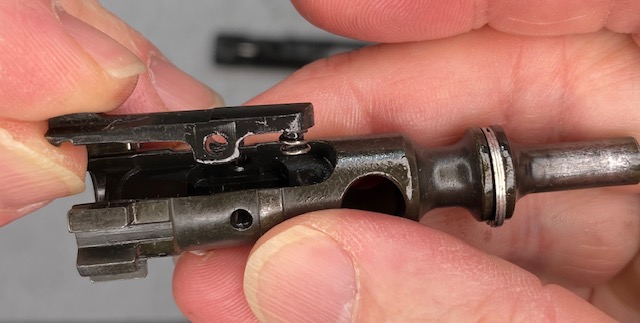
Reassembling the Bolt Carrier Group is just the reverse of the disassembly steps. First, replace the extractor by lining up the holes in the extractor with the hole on the bolt. Pinch the extractor to the bolt while inserting the extractor pin. It should push right in with your fingers if you squeeze it a bit.
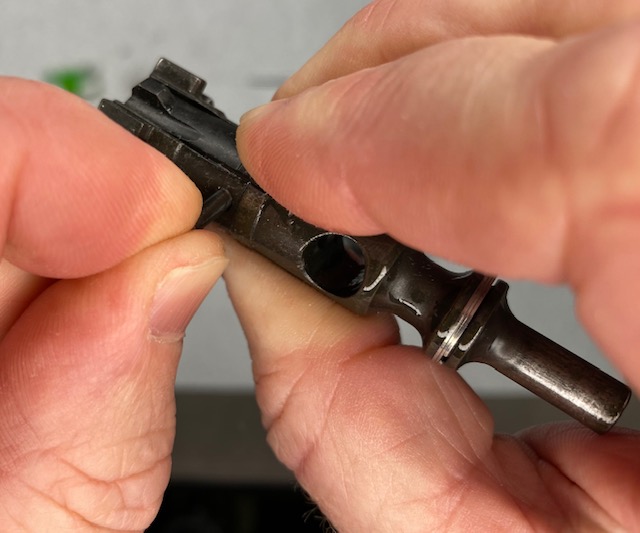
Insert the bolt into the bolt carrier with the extractor in roughly the 11 o’clock position when holding the bolt carrier as shown in the picture. then line up the slot in the carrier with the hole in the bolt. Insert the Cam Pin. If it does not go in, you may need to rotate the bolt 180 degrees.
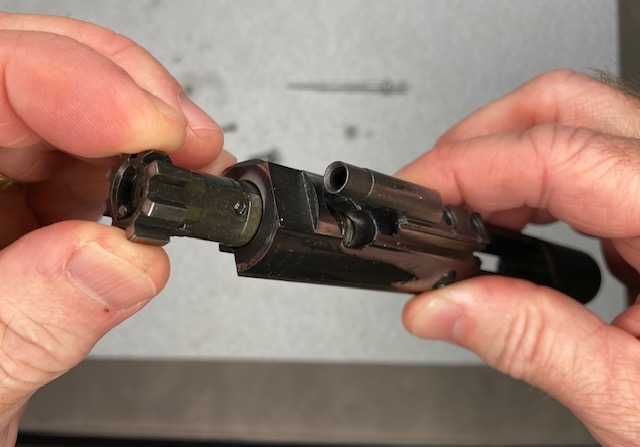
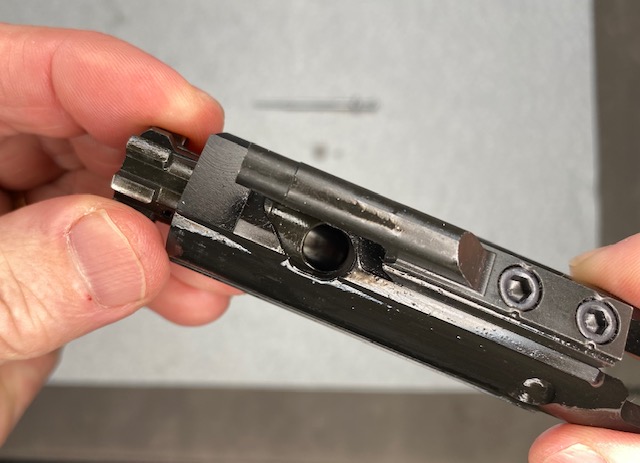
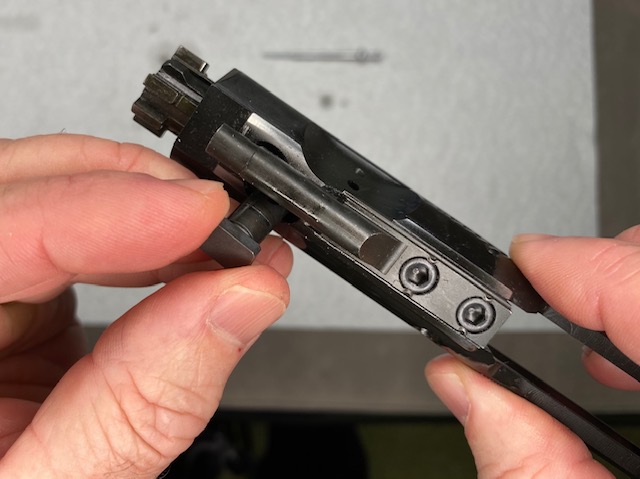
Once the Cam Pin is inserted, turn it 90 degrees as shown in the pictures below.
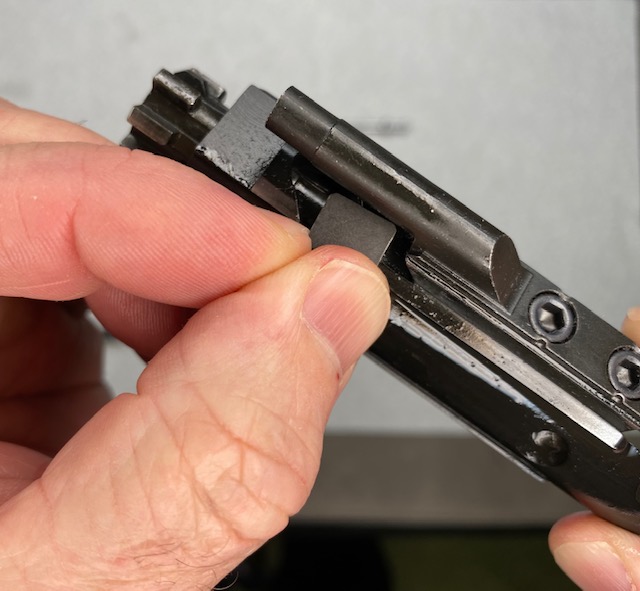
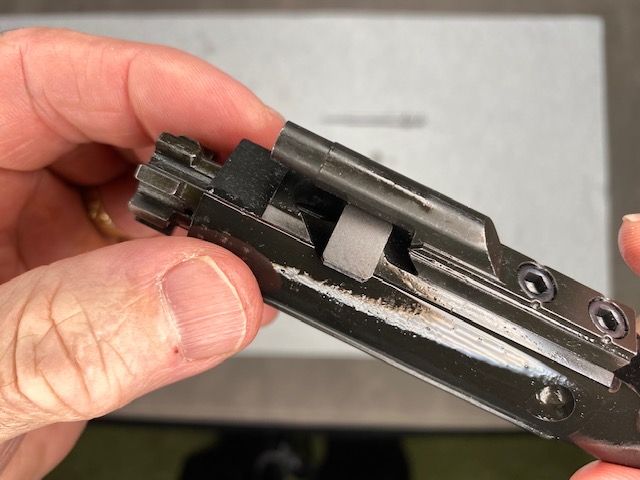
After the Cam Pin is properly inserted, the Firing Pin is next. Simply drop it into the Bolt from the inside of the carrier. Then press on it to be sure it is seated all the way.
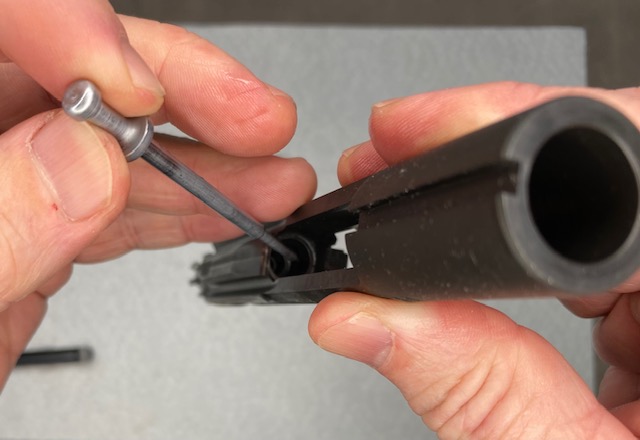
While applying a little pressure on the Firing Pin, insert the Firing Pin Retainer to hold it in place.
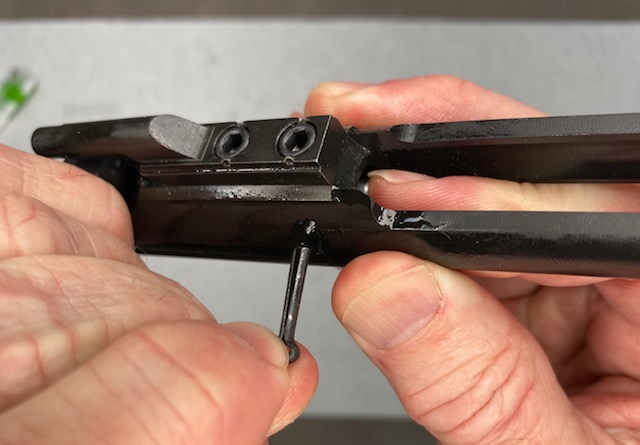
The Bolt Carrier Group is now completely reassembled. Now we will install it back into the Upper.
Re-install the BCG into the Upper
In order for the Bolt Carrier Group to go into the Upper, you must be sure the bolt is in the forward-most position in relation to the carrier. This moves the Cam Pin to the middle of the slot, where it needs to be for the BCG to slide into the Upper.
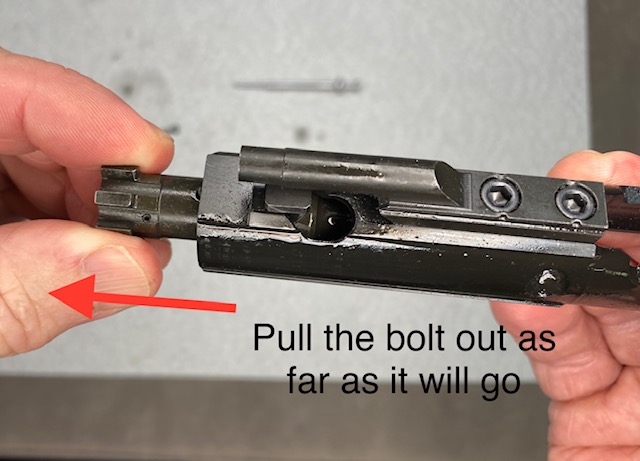
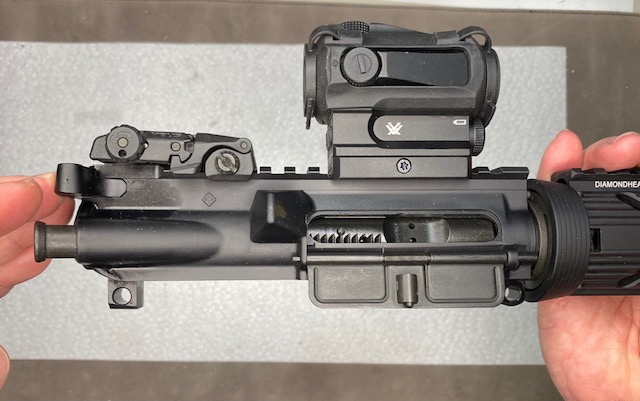
Turn the Upper upside down and insert the Charging Handle first. It goes in a short distance, then it needs to drop down into the lower slot. There are “ears” on the charging Handle that will line up with matching notches in the Upper.
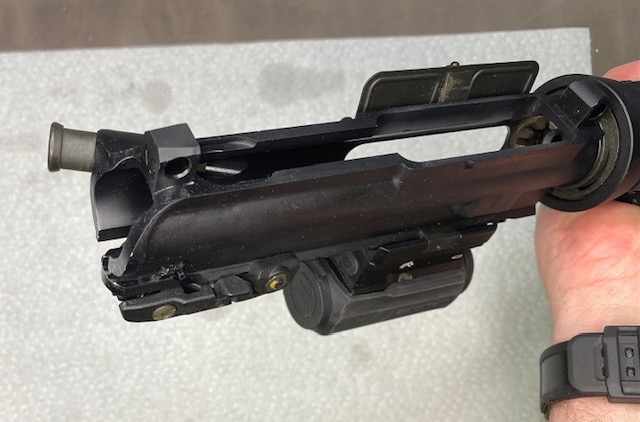
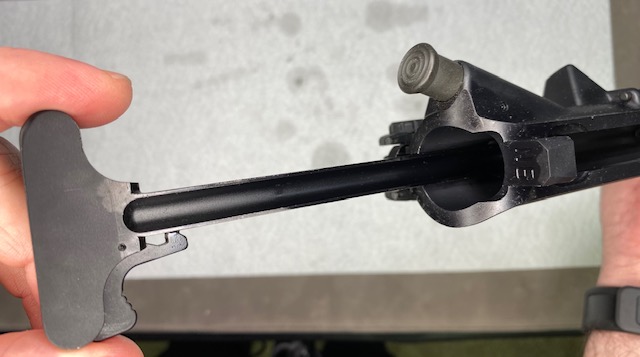
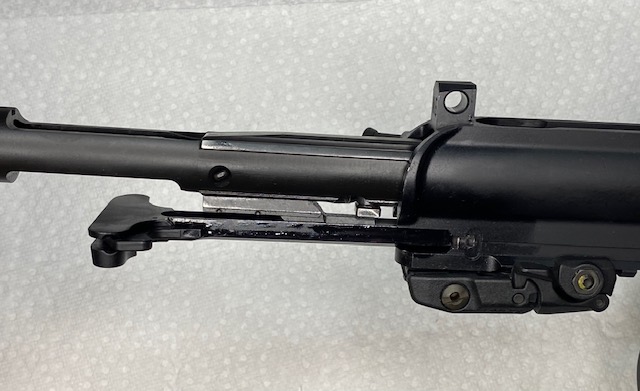
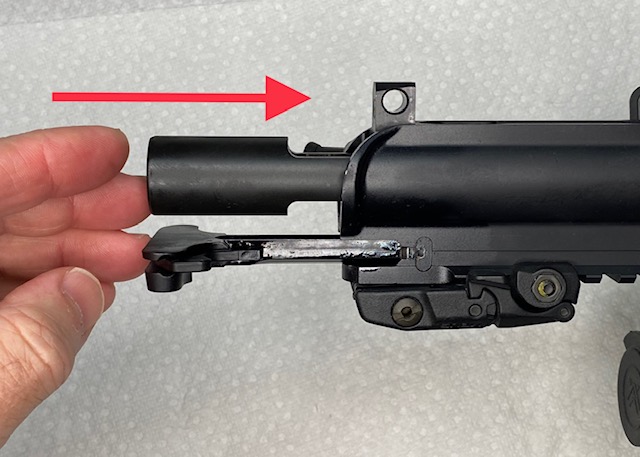
Now that the Charging Handle is in the lower slot, leave it about half of the way out. This allows the Bolt Carrier Group “Carrier Key” to fit into the charging Handle slot.
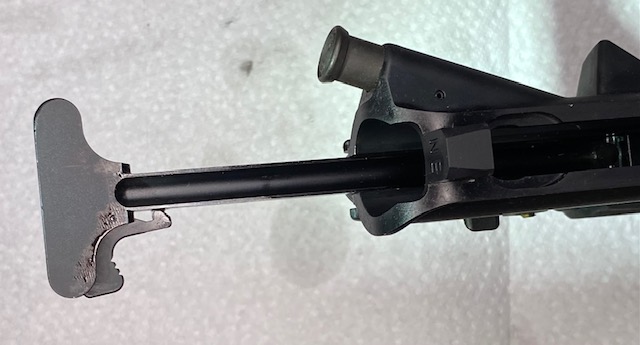
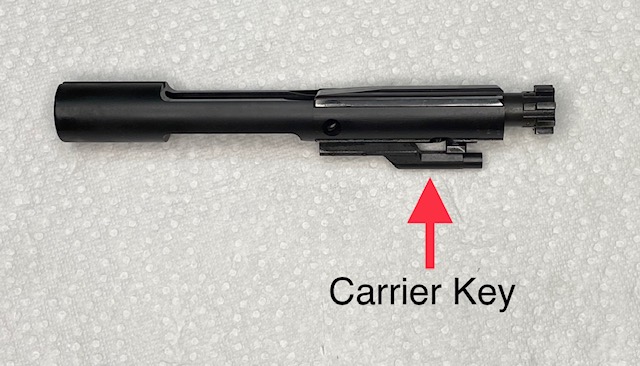
Align the Carrier Key on the Bolt Carrier with the slot in the Charging Handle. Then carefully slide the Charging Handle and the BCG into the upper until it clicks into place.

Reassemble the Upper to the Lower
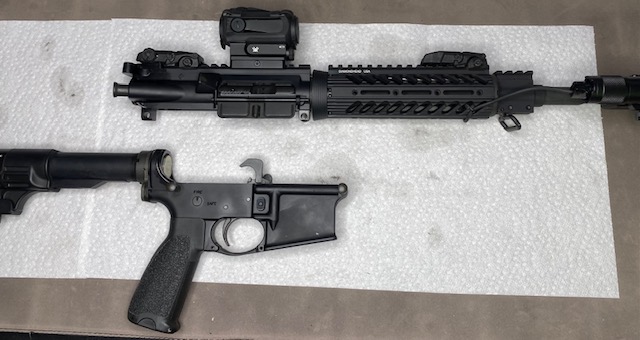
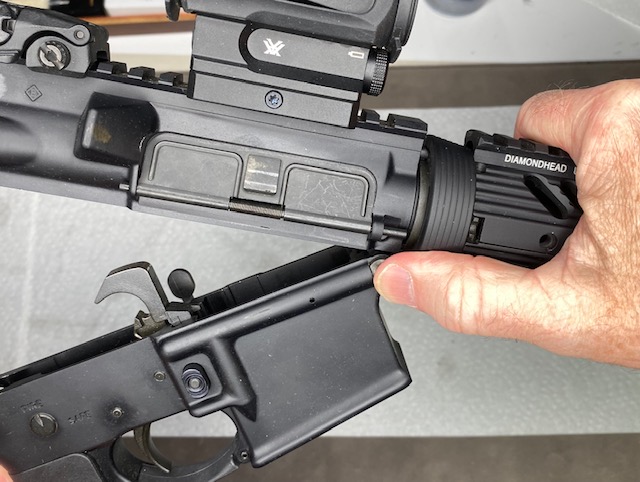
In this final step we will complete the reassembly of the AR-15 rifle. All that needs to be done is to re-attach the Upper to the Lower. The Lower should have the hammer in the position shown. If it isn’t, get a secure grip on the hammer while you press the trigger to release it. Do not let the hammer slam into the front of the lower as it may cause damage.
Be sure both take-down pins are pulled out as far as they go. Line up the front pin first and push it in all the way. Now pivot the Upper and line up the rear pin. Squeezing the Upper and Lower together will help the pin go in easier.
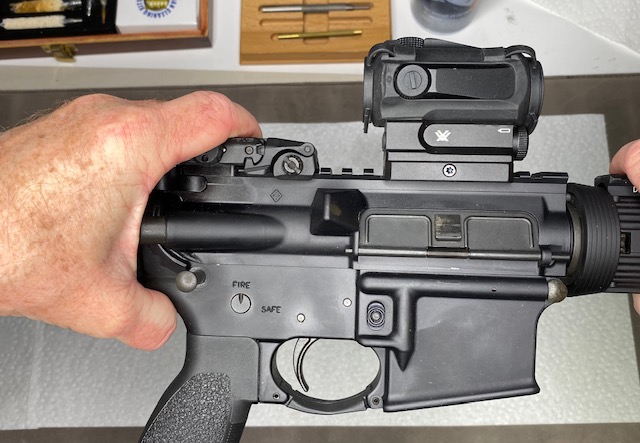
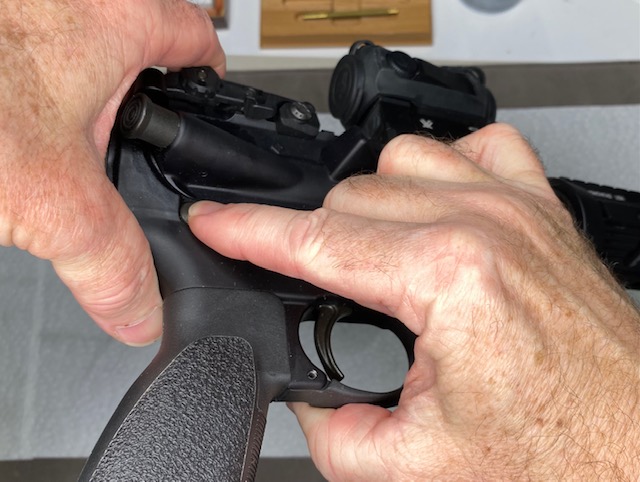
your AR-15 is now fully assembled. Wipe off any excess oil form the exterior. Work the Charging Handle a few times and perform the function and safety check recommended by the manufacturer of your particular rifle before you use live ammunition.
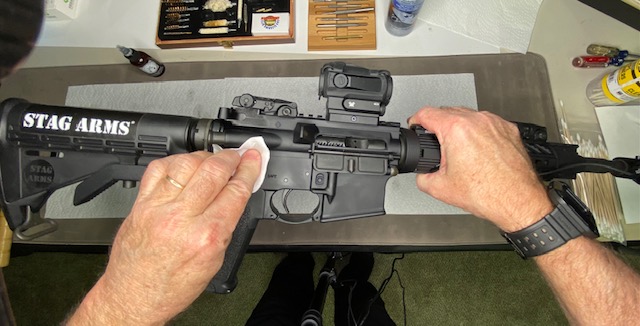
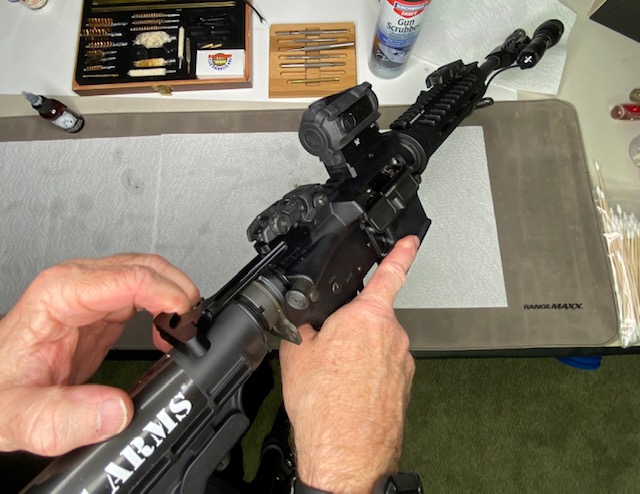
Perform Function and Safety checks as per your AR-15 Operation Manual
You should always check your rifle to be sure it is operating correctly before you use it to fire live rounds.
How Often Should I Clean My AR-15?
AR-15 rifles have a reputation of running even when dirty, but it is always best practice to clean any firearm anytime it is fired, as well as before first use when it is brand new. I have heard that most people do not clean their AR-15s very often and as long as they are well lubricated it is rarely an issue.
If you want peace of mind that your gun will run when you need it, keep it clean!