This article will show you how to disassemble an AR-15 BCG (Bolt Carrier Group) and Bolt in order to clean it so that it works properly every time. You will learn the instructions and steps for complete disassembly and reassembly of the BCG of an AR-15, including the extractor and ejector components.
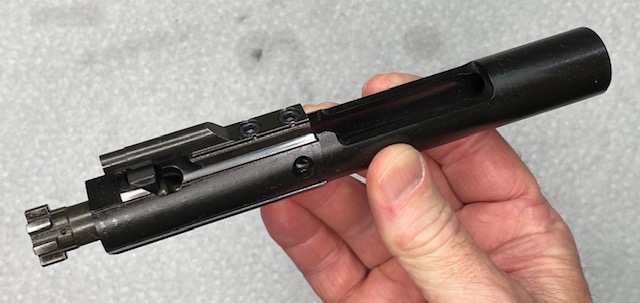
The BCG or Bolt Carrier Group of an AR-15 rifle (AR stands for Armalite rifle) is one of the most important parts to keep clean and lubricated. The Bolt itself does most of the work in extracting spent brass and loading a new round into the chamber. If the bolt is not properly maintained, your rifle could malfunction and fail to function when you need it most.
___________________________________________
Here is the CALIBER DEBATE VIDEO:
____________________________________________
AR-15 Bolt Carrier Group components
The AR-15 bolt Carrier is made up of these components:
- Bolt Carrier
- Cam Pin
- Firing Pin
- Firing Pin Retainer
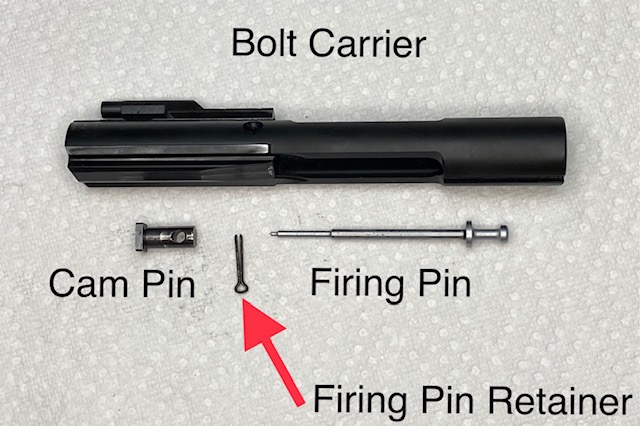
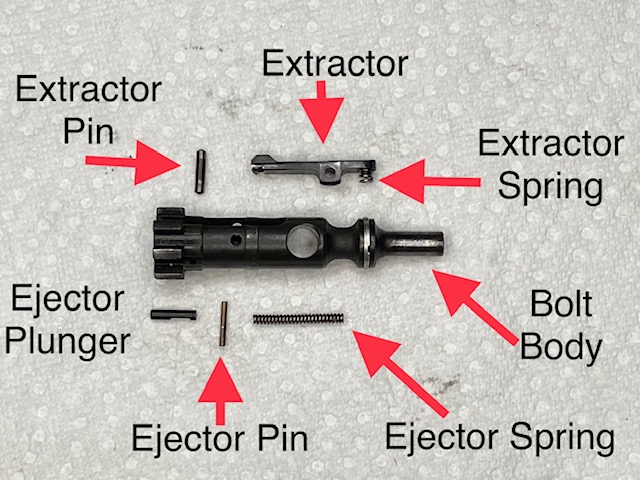
The AR-15 Bolt itself, which fits inside the Bolt Carrier, is made of the following parts:
- Bolt Body
- Ejector Plunger
- Ejector Pin
- Ejector Spring
- Extractor
- Extractor Spring
- Extractor Pin
Tools you will need to disassemble an AR-15 BCG
In order to completely disassemble the BCG on an AR-15, you will need just a few tools:
- A set of Gun Punches
- A Real Avid Smart Bench Block (optional but super handy!)
A Gun Punch set is a basic necessity for an AR-15 Owner. Below are some good options available at Amazon.
BESTNULE Punch Set. Includes Pin Punches, Roll Pin Punches, and Hammer.
Roll Pin Punch Set 9pc Craftsman Tool Set. Compact, small set of Roll Pin Punches.
The Real Avid Bench Block is one of several similar tools to help you remove roll pins from forearms without damage to the gun. It is possible to use a block of wood or even the edge of a workbench to support the Bolt as you tap a pin out. There needs to be room under the Bolt to allow the pin to come out.
Real Avid Bench Block Options – Choose from Smart Bench Block, Master Bench Block Pro or Pro Kit
Step-by-Step: How to Disassemble an AR-15 BCG
Fortunately, disassembling the AR-15 bolt carrier group is not a difficult task. You only need a few basic tools to do it, and a little knowledge on how to do it properly. In this article, I am going to show you step-by-step how to completely disassemble and reassemble the BCG for cleaning.
For this article, I will assume that you have already removed the BCG from your AR-15 Rifle. If you need to know how to do this, See my Article on How to Disassemble & Clean an AR-15 Rifle. or the AR-15 Disassembly Article.
AR-15 BCG Disassembly: Removing the Firing Pin
Locate the Firing Pin Retainer, which resembles a cotter pin, and use a small tool, such as a punch, to pull it completely out.
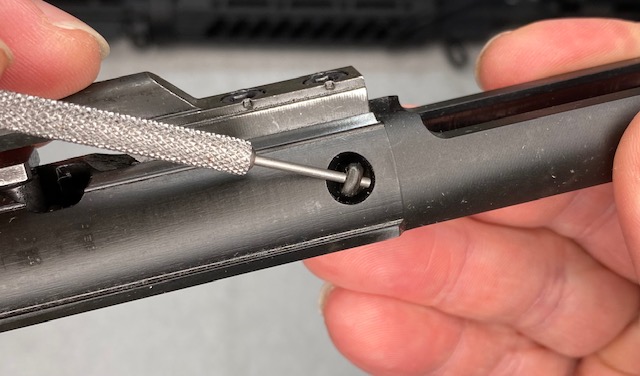
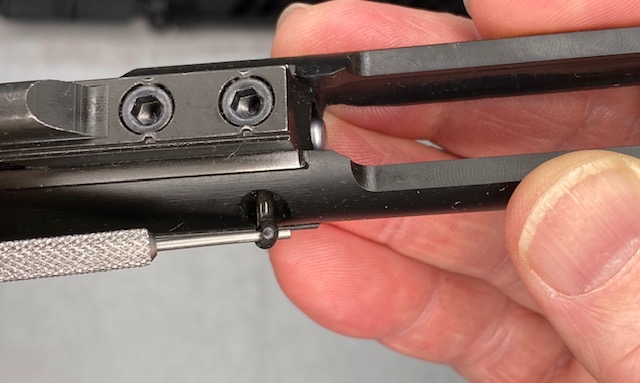
Now the Firing Pin is released and will fall out of the bolt. If it does not fall out, shake the BCG and it will come out.
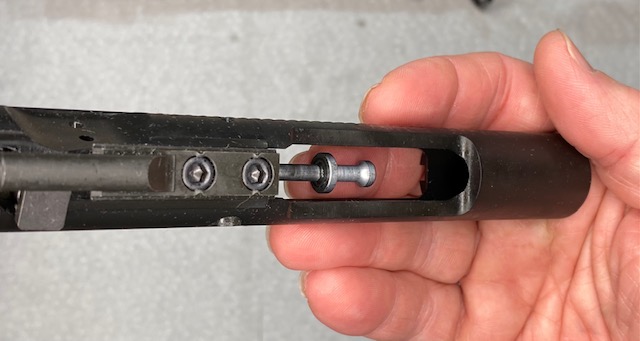
AR-15 BCG Disassembly: Removing the Bolt
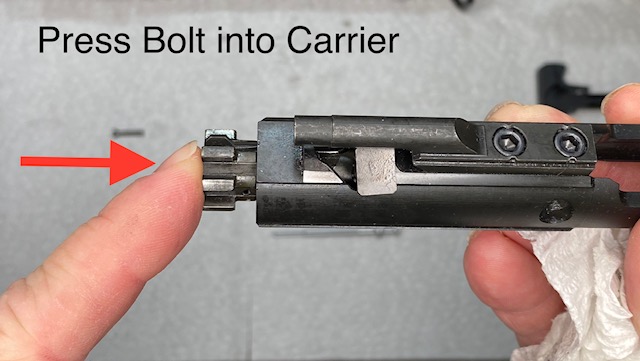
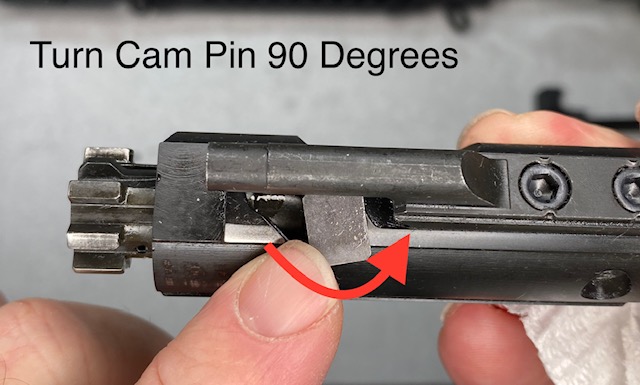
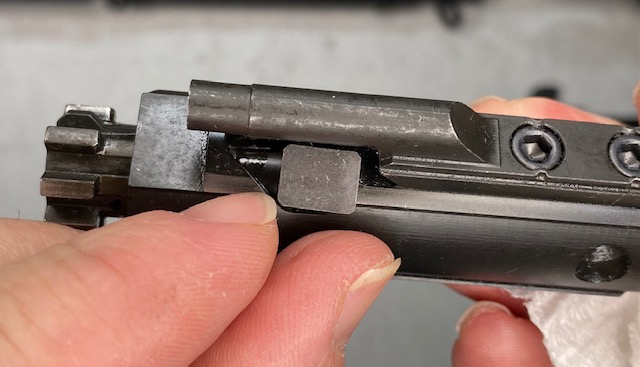
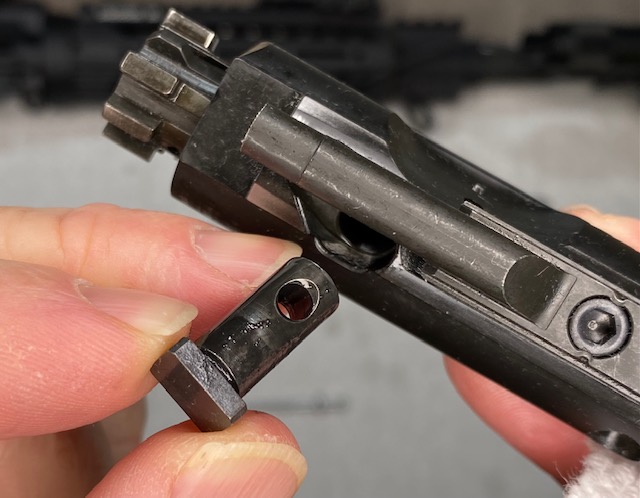
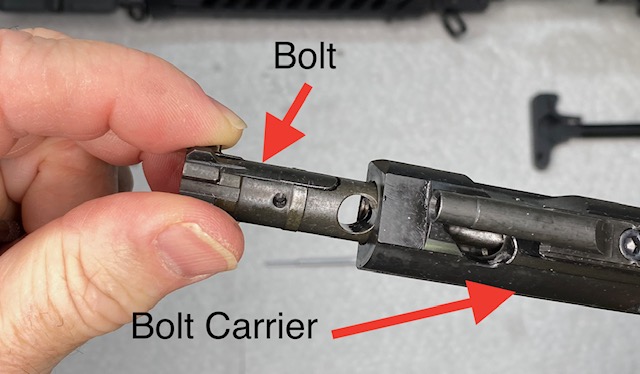
With the Firing Pin now removed, we can now remove the Bolt from the Carrier. Press the Bolt all the way into the Carrier in order to position the Cam Pin for removal. Turn the Cam Pin 90 degrees and pull it out of the Bolt & Carrier. Now you can pull the Bolt out of the Carrier. This may take a bit of force.
AR-15 BCG Disassembly: Removing the Extractor
Now let’s take a closer look at the bolt.
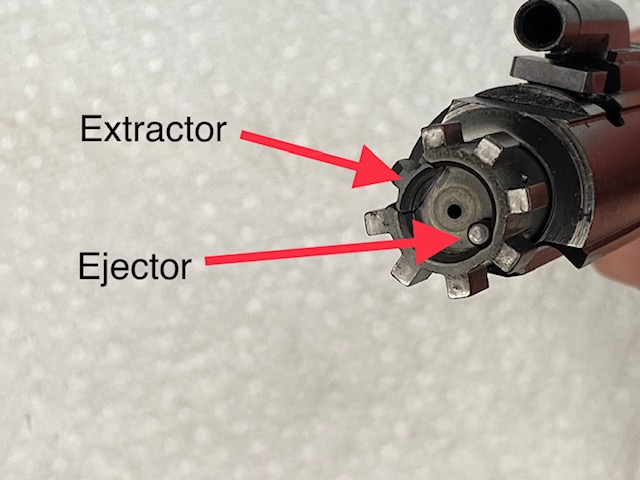
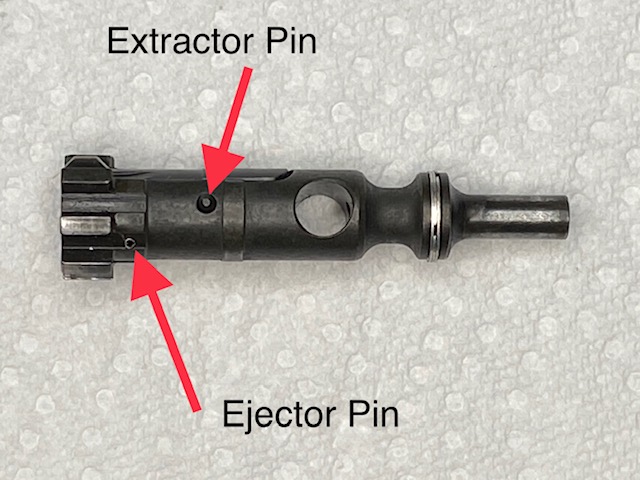
Here we have the Ejector and the Extractor to remove. These are both held in with a pin. We will need to push the pins out with a small punch.
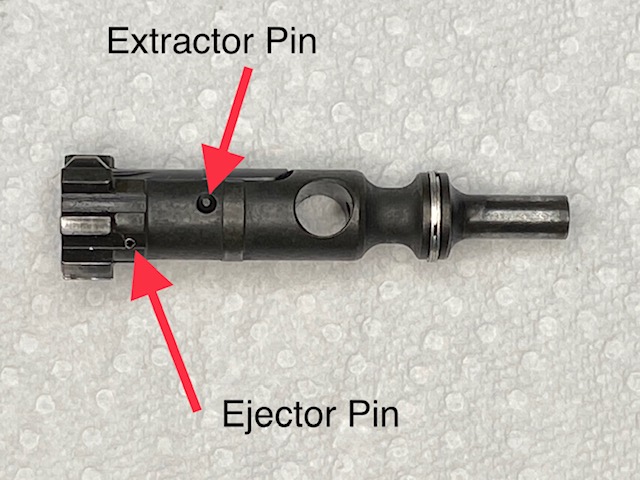
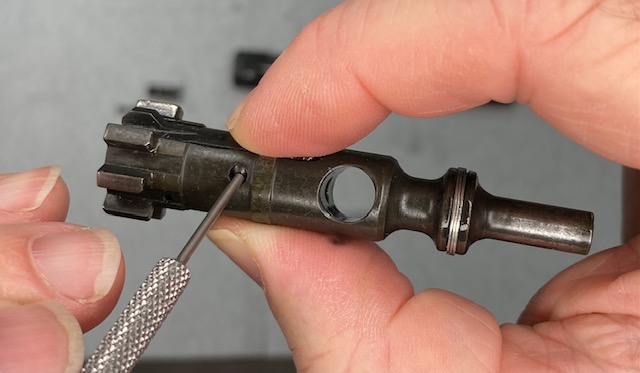
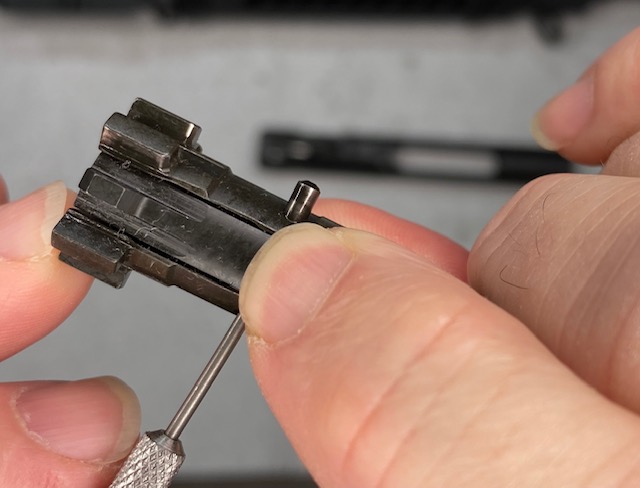
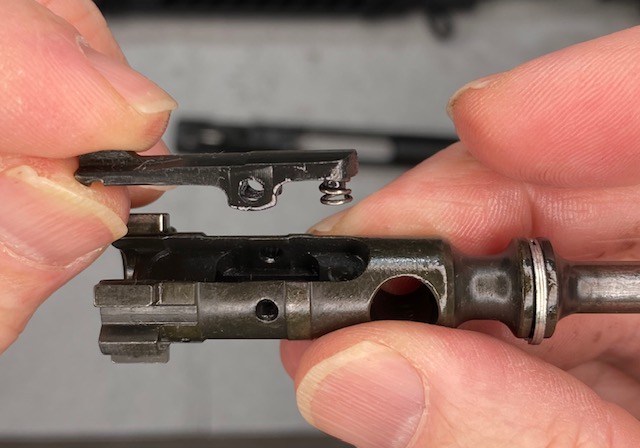
To remove the Extractor, hold the Bolt between the thumb and forefinger of one hand right at the Extractor Pin. Squeeze the Extractor, and the Extractor Pin should come out very easily with just a push with a small punch. The Extractor and Extractor spring will then lift off the bolt body.
AR-15 BCG Disassembly: Removing the Ejector
**Wear Eye Protection for the next part as springs are involved that can launch small parts at your face & eyes.
Next, we will remove the Ejector from the bolt by removing the Ejector Pin. This operation is not as easy as the last one.
**Please note: Disassembling and reassembling the Ejector and Ejector Spring is only recommended if you are adept at handling small parts with springs. Please read ahead to understand the requirements.
Locate the Ejector Pin on the Bolt body.
The Ejector Pin is much tighter so it will require a 1/16″ punch and a few light taps from a mallet. To do this you will want to support the bolt with something that will not damage the bolt.
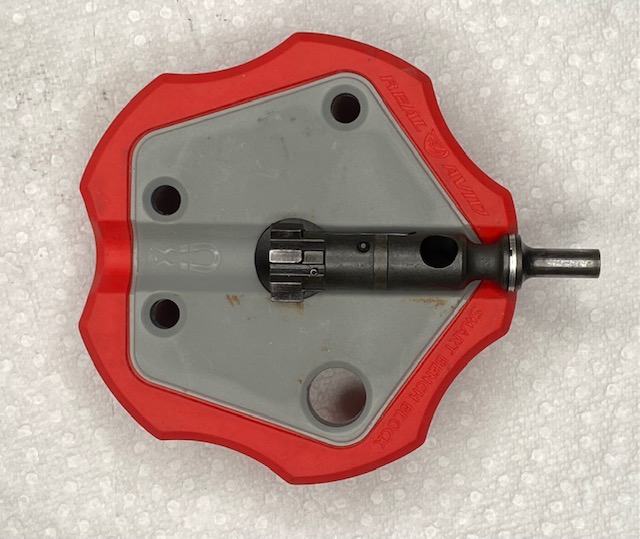
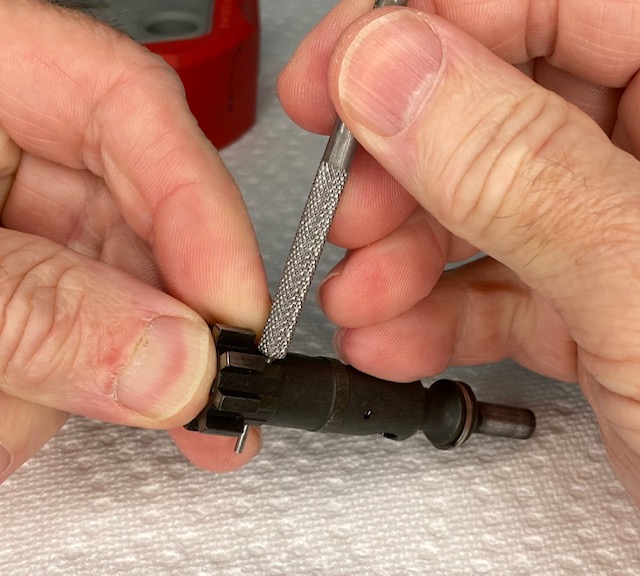
Take the 1/16″ punch and gently tap on it until it pushes the Ejector roll Pin all the way out, and now the punch is holding the Ejector in place.
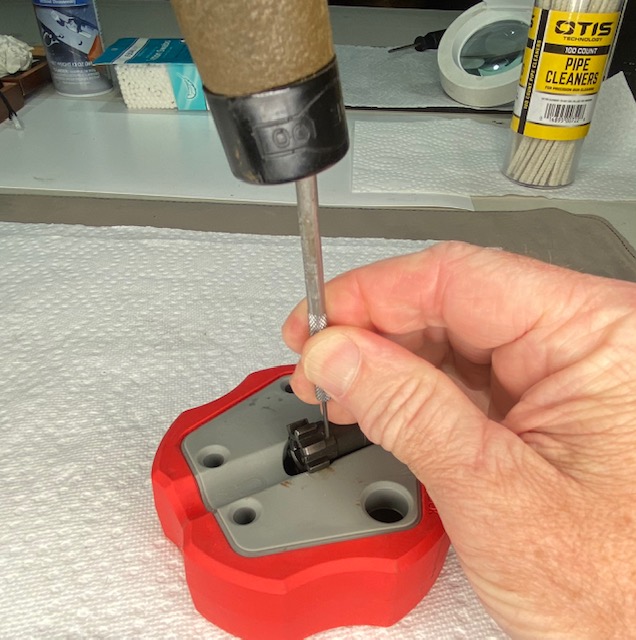
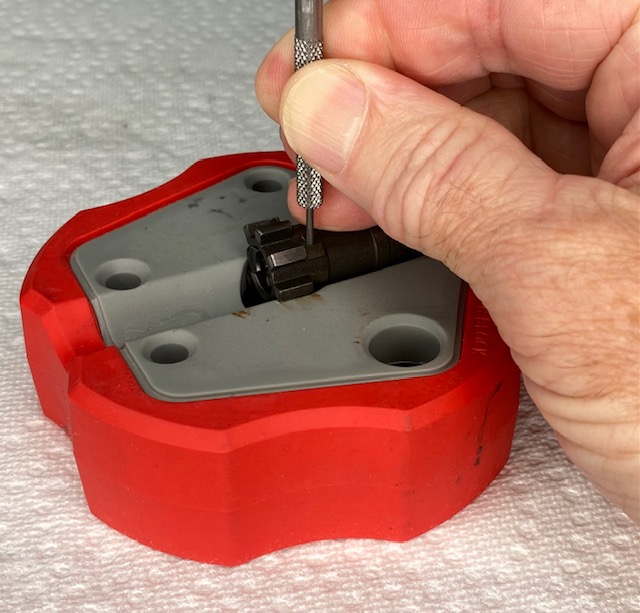
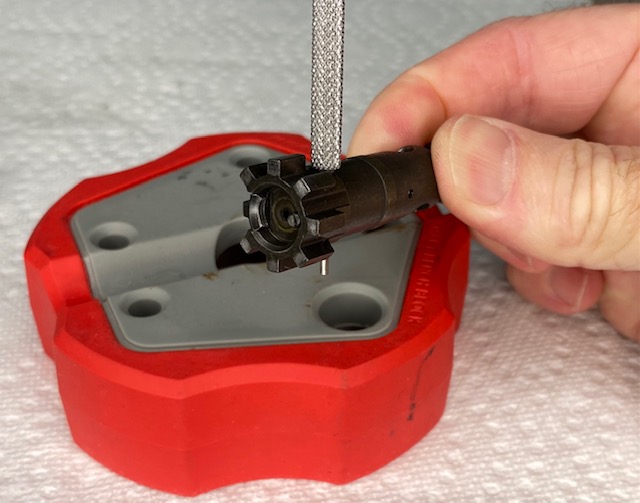
Remove Ejector Plunger & Ejector Spring
**Be careful on this next step. The Ejector is under spring pressure!
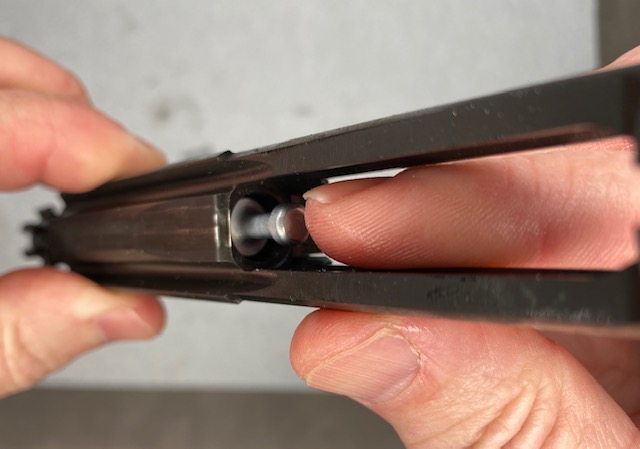
Place a finger on top of the Ejector on the end of the Bolt. This will prevent the Ejector from being launched across the room when you remove the punch. Then slowly remove the punch and the Ejector Plunger and Ejector Spring will come out. If they do not drop out, gently tap the Bolt on the table to get them out.
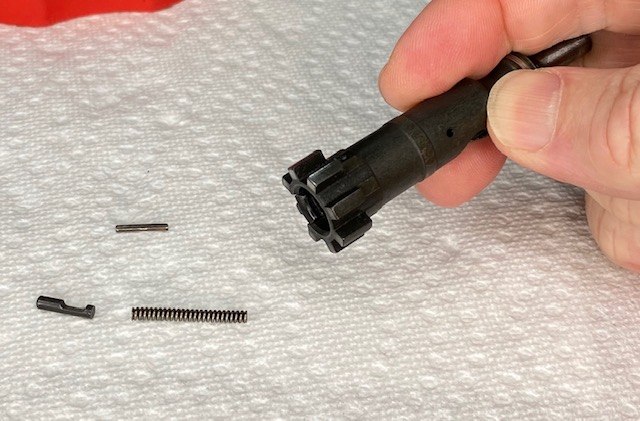
You have now completely disassembled the AR-15 Bolt Carrier Group. Now you can clean each component using your preferred method. Then lubricate and Reassemble. If you need tips on how to clean the AR-15, See the following article:
How to Disassemble & Clean an AR-15 Rifle
Video: How to Disassemble an AR-15 BCG: Ejector & Extractor
Reassembly of the AR-15 BCG
After you clean and lubricate the components of the AR-15 BCG, it is time to put it back together. Here are the reassembly steps for the bolt Carrier Group.
First we will install the Ejector Spring and Ejector Plunger. This is arguably the most difficult part of the reassembly process, but if you are fairly good with small parts, you should be able to do it with the instructions below.
Re-installing the Ejector Spring and Plunger into the Bolt
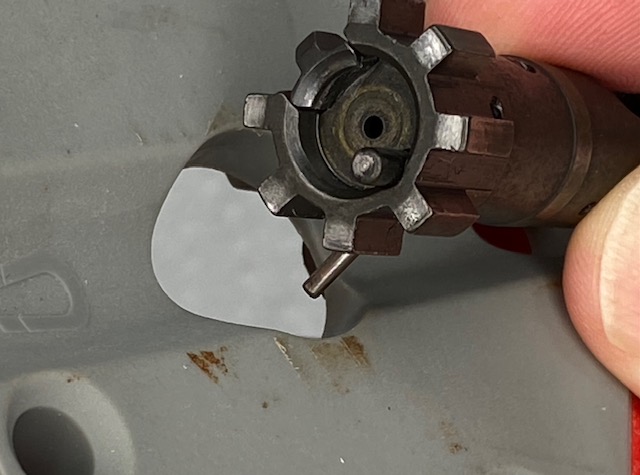
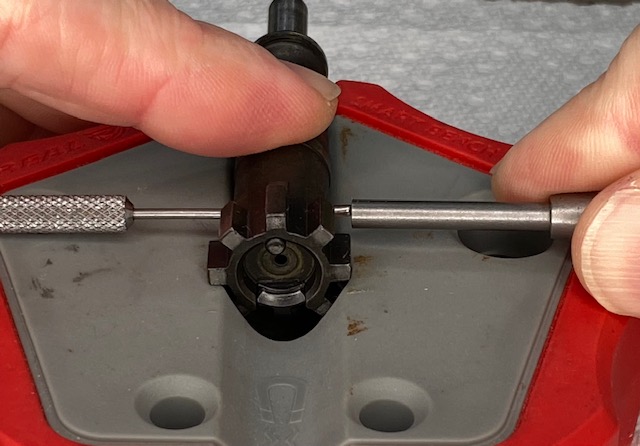
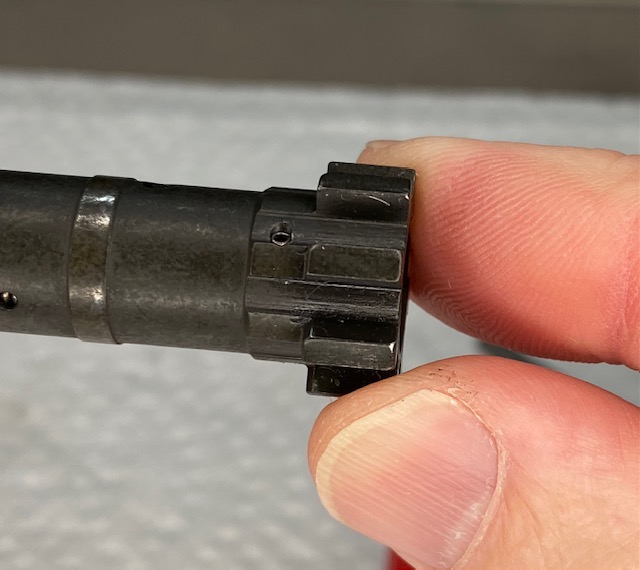
First step is to partially insert the Ejector Pin into the Ejector Pin hole. you should be able to do this with just your fingers, but if not, place it back on the Bench Block and tap it in with the mallet. Be sure it is only in far enough to stay put. If it is in too far, the Ejector Spring and Plunger will not go in.
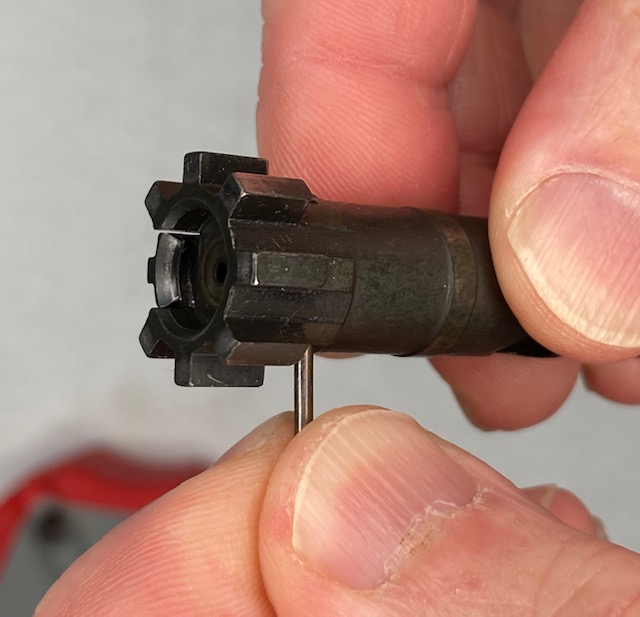
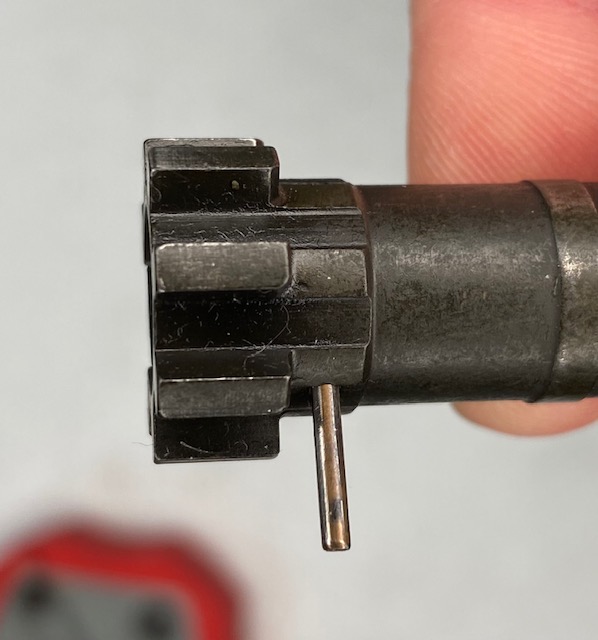
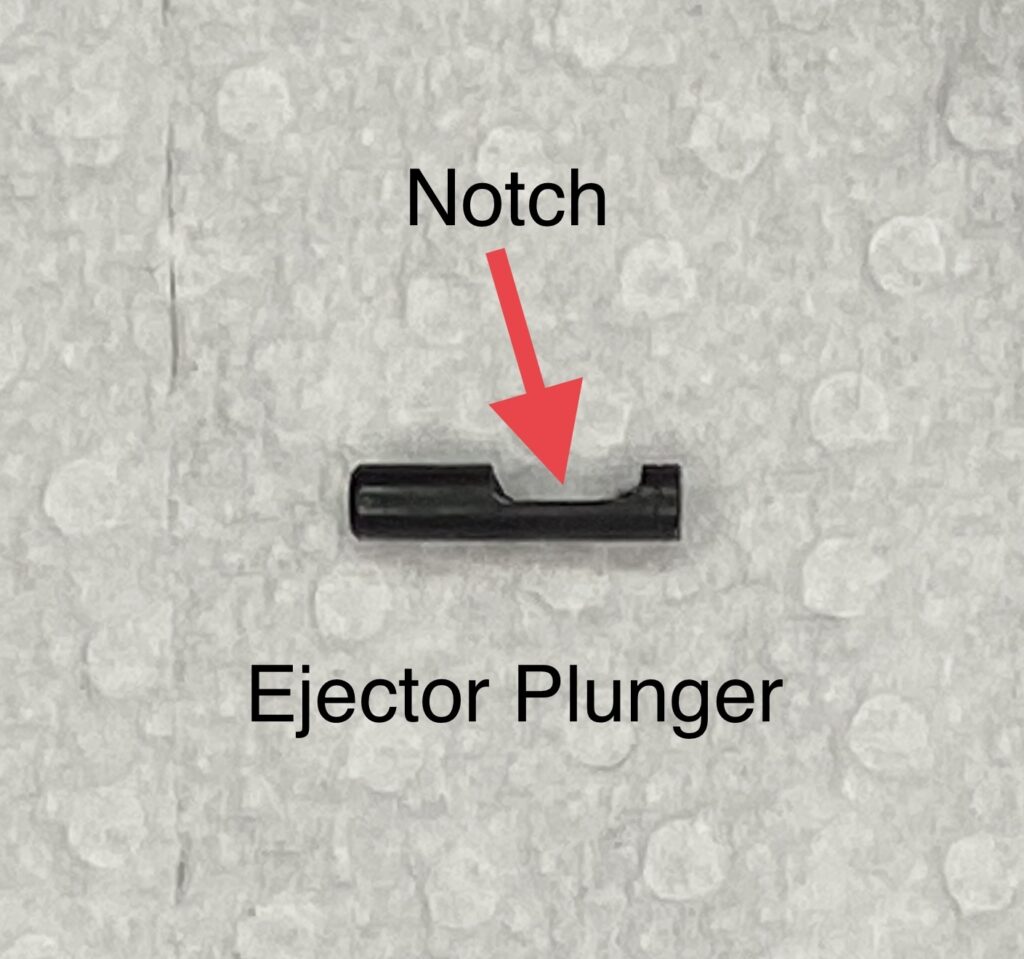
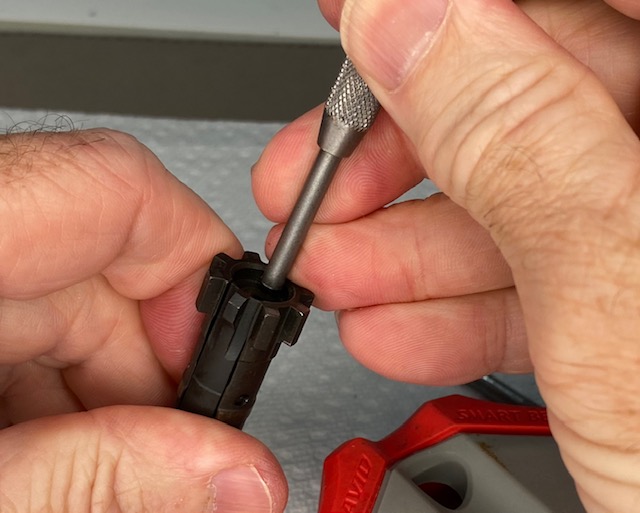
Next, drop the Ejector Spring into the Ejector hole on the end of the Bolt. Then insert the Ejector Plunger into the hole, making sure it is oriented properly. The notch in the Plunger needs to be facing the center of the bolt face or the outside edge of the bolt. I prefer it face the center, as I find it easier to line it up.
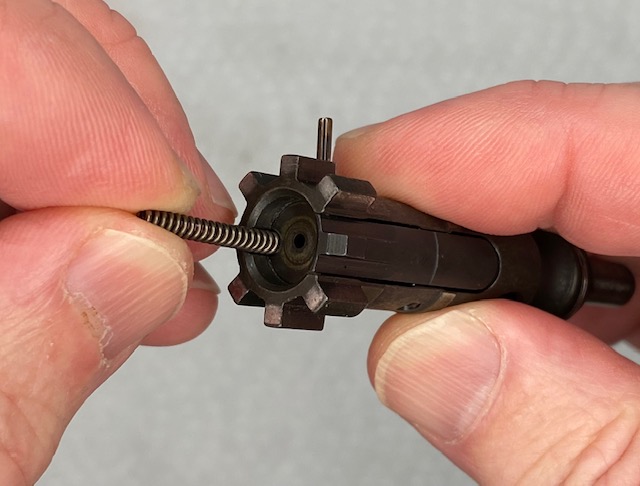
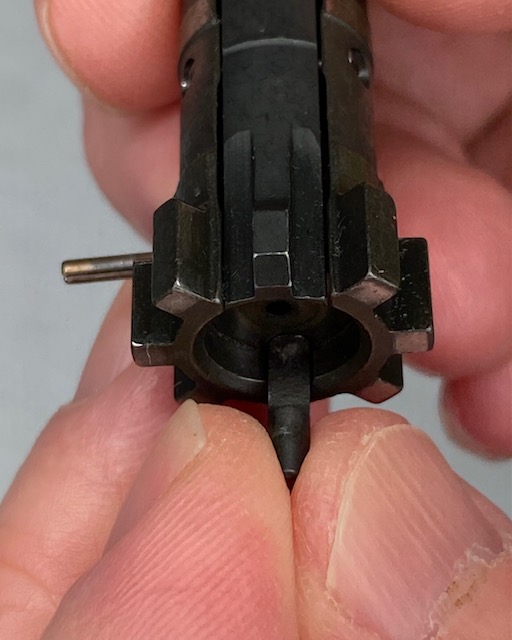
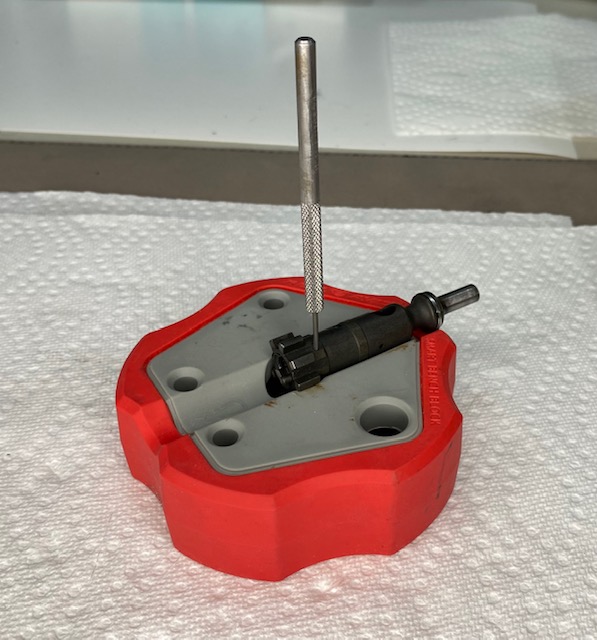
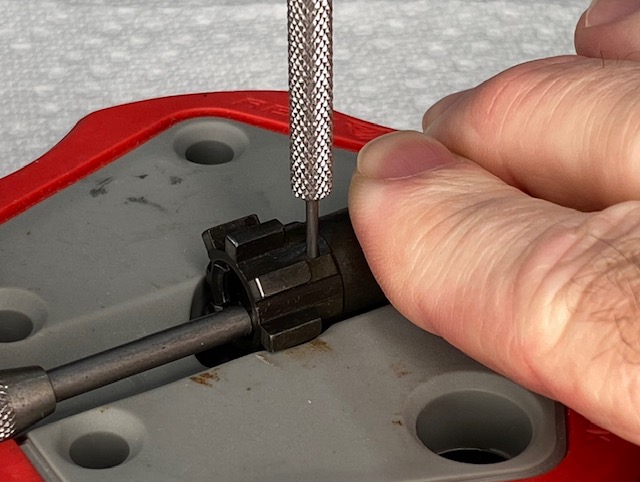
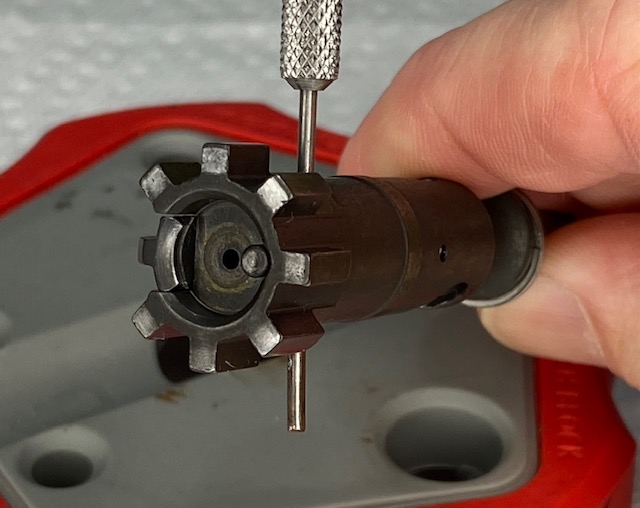
Now we need to press on the Plunger while simultaneously inserting a 1/16″ punch into the Ejector Pin hole from the OTHER side. The punch will temporarily capture the Ejector Plunger notch to hold it in place, then we will tap in the ejector Pin to replace the punch.
Capture the Plunger Notch with a 1/16″ punch
To do this, place the Bolt on the Bench Block and hold it securely in place. Take a larger punch and use it to push the Ejector Plunger into the Bolt. This will allow the 1/16″ punch to drop down far enough to capture the notch. Once it is captured we will carefully tap the Ejector pin all the way in, which will push the 1/16″ punch out the other side.
Now test the Ejector by pressing the Plunger down with a large punch, and making sure it pops back up when you release it.
Reassembling the AR-15 BCG Extractor
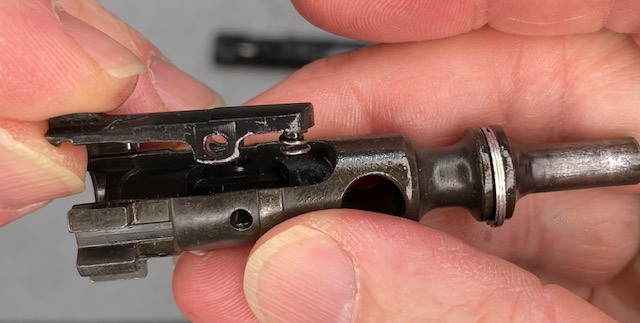
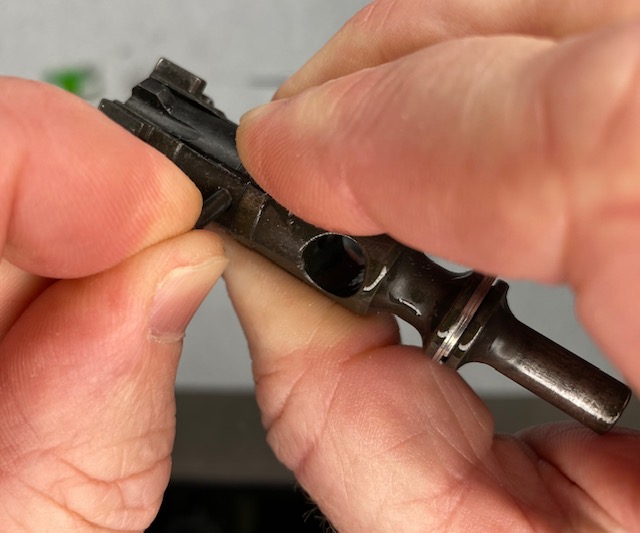
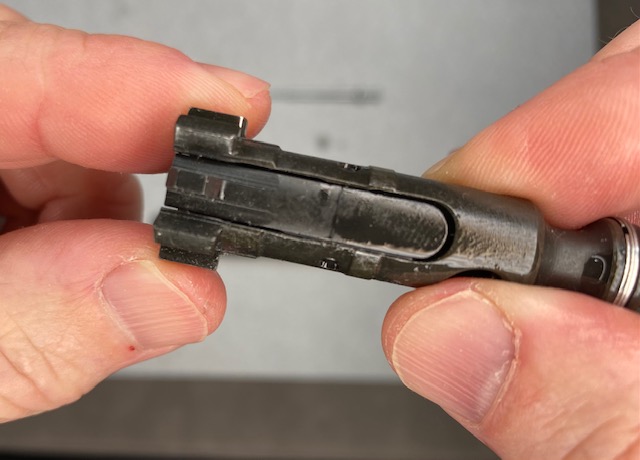
To reinstall the Extractor, we simply need to line it up with the holes on the Bolt and push the Extractor Pin back in. then squeeze the Extractor to the bolt and the pin should go in very easily.
Reassemble the AR-15 Bolt into the Carrier.
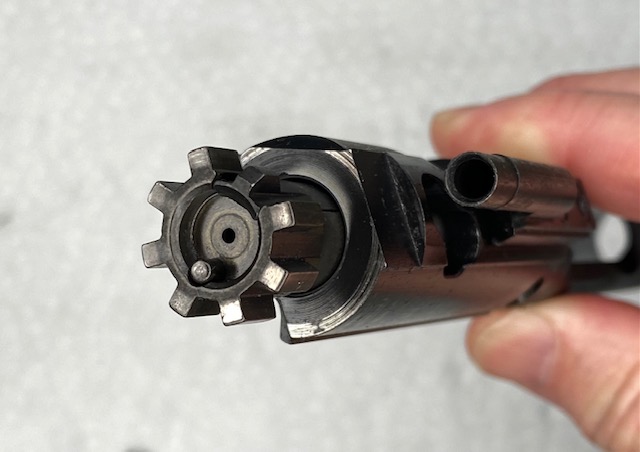
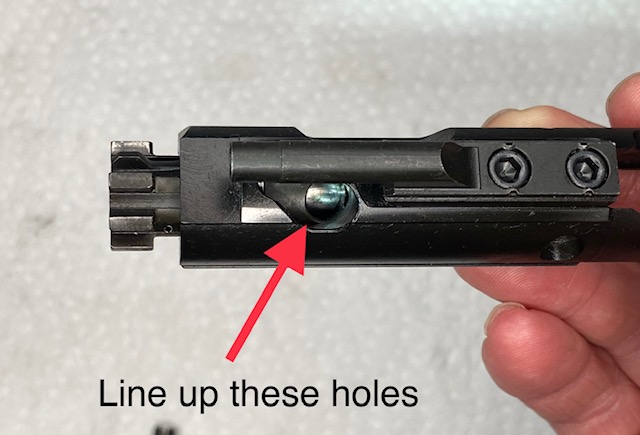
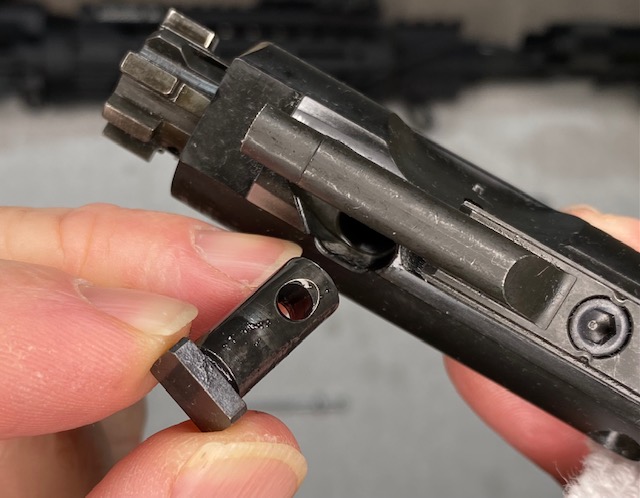
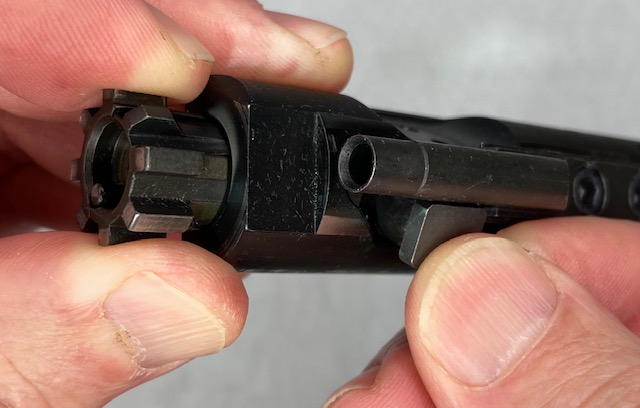
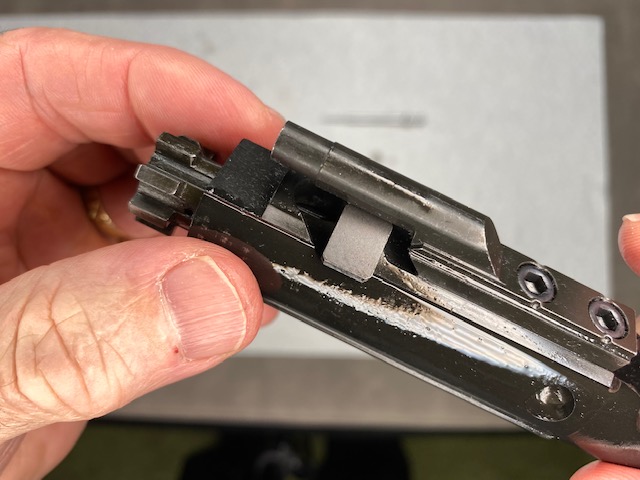
Now that the Bolt is reassembled, we will reassemble it to the Carrier. First step is to insert the bolt into the Carrier in the proper orientation. It will only work one way. Be sure to line it up as shown in the pictures below. After it is inserted, the big hole in the bolt must be lined up with the slot in the Carrier and the Cam Pin will then be inserted.
Install the Firing Pin and Retainer
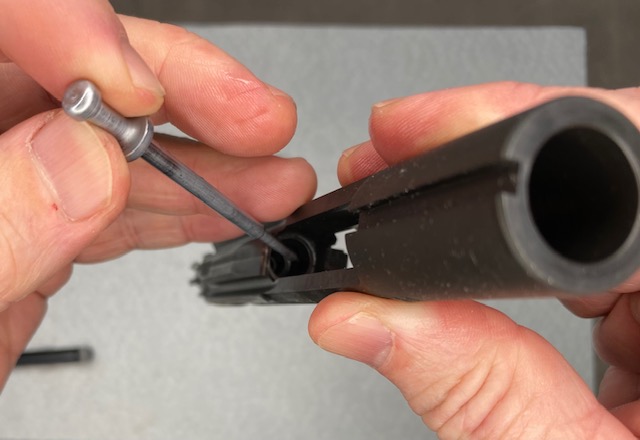
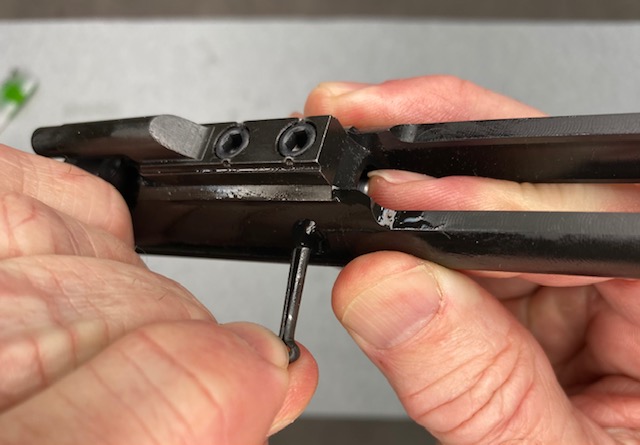
Next we will install the Firing Pin and Firing Pin Retainer. Drop the Firing Pin into the center of the bolt Carrier. Push down on the head of the Pin to be sure it is seated all the way. Next, insert the Firing Pin retainer into the hole on the side of the Bolt Carrier.
How to Disassemble & Reassemble an AR-15 BCG Video
Here is a video showing most of the above steps except for the removal of the Ejector Plunger & Ejector Spring.
You are done! you have now learned how to disassemble an AR-15 BCG (Bolt Carrier Group) and then reassemble it. It really is not hard once you see how it all goes together and get your hands a little dirty doing it!
Once you do this a couple of times you will be an expert and will be able to do it quickly and easily without instruction.