How To Disassemble (Field Strip) An AR-15 Rifle
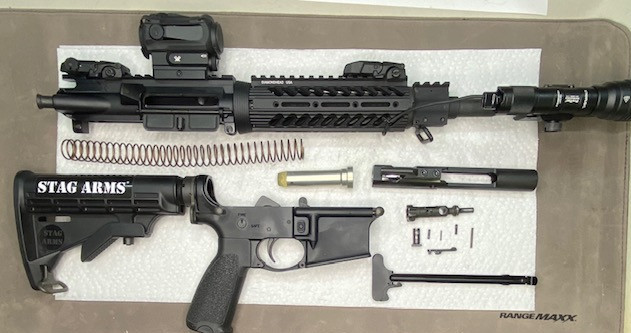
In this article I am going to show you how to disassemble AR-15 style rifles for cleaning and lubrication. Also known as field stripping an AR 15, knowing how to disassemble an AR-15 rifle is essential in order for you to keep it clean and properly lubricated.
I will be using a Stag Arms Stag 15 AR-15 to demonstrate the disassembly steps.
There are other reasons to Field Strip an AR-15 rifle, such as upgrades and repairs but mostly this will be done on a regular basis for maintenance.
This article will focus on AR-15 disassembly instructions only. If you need instruction on cleaning and lubrication please see this article;
How to Disassemble, Clean & Lubricate an AR-15 Rifle
___________________________________________
Here is the CALIBER DEBATE VIDEO:
____________________________________________
Stag Arms, Smith & Wesson, Bushmaster, Daniel Defense AR-15 Disassembly: It’s all the Same
The beauty of the AR-15 platform rifle is that all makes and models are essentially the same in terms of their main components. This means that regardless of the manufacturer that makes your AR-15, the steps for disassembly and reassembly remain the same.
There may be some differences in the particular accessories attached to your rifle, such as the handguard, a possibly upgraded grip, or a different type of adjustable stock. These are minor differences that do not significantly impact the disassembly process when cleaning your rifle.
AR-15 disassembly is not complicated, and anyone with basic mechanical skills can do it without issue. The only part that gets a bit tricky is removing the Ejector from the Bolt. This part is not necessary when doing regular cleaning unless there is an issue with ejection and the problem lies with the Ejector.
Parts of the AR-15
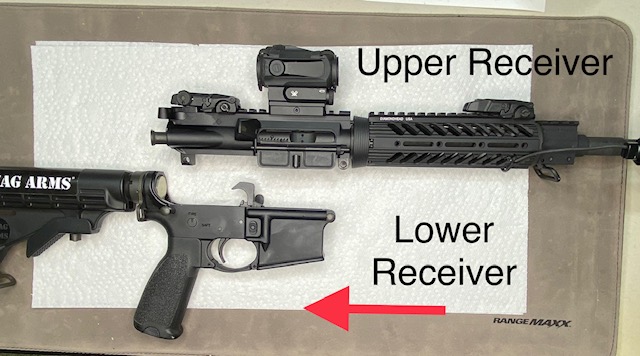
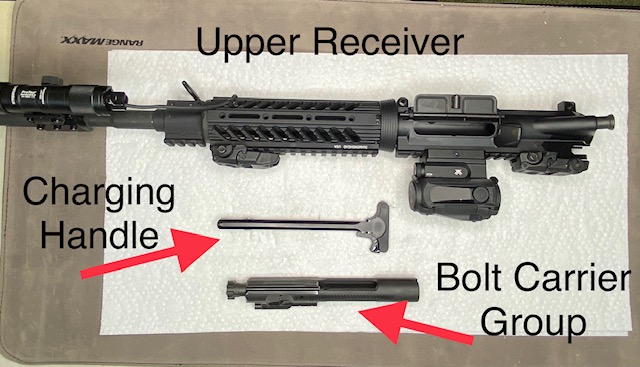
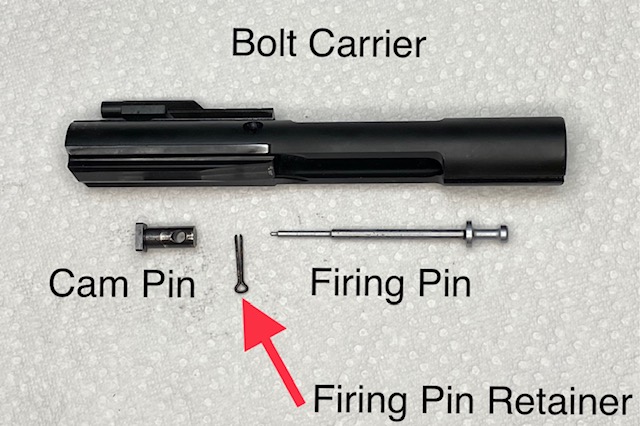
Below are several diagrams showing the parts of the AR-15 rifle. These do not show every part, just the parts we will be disassembling for this article. This article will focus on field stripping the rifle primarily for cleaning purposes.
Tools Needed to Disassemble an AR-15 Rifle
The AR-15 disassembly process requires minimal tools. The only tools you will need include a few gun punches, a small screwdriver, and, optionally, a bench block such as a Real Avid Smart Bench Block to help disassemble the Ejector and Extractor from the AR-15 Bolt.
First, I will list the steps we are going to cover, and then I will walk you through each process
with pictures and descriptions.
For the most part, you will need to follow these steps in order. However, once you are familiar with the disassembly and reassembly steps, you will understand how it is done, and the order will become obvious.
___________________________________________________
Here is the CALIBER DEBATE VIDEO:
____________________________________________________
How to Disassemble an AR-15: Steps
1. Verify your rifle is completely unloaded. This is the most critical step and must be done every single time you handle your AR-15
2. Separate the upper receiver from the lower receiver.
3. Remove the bolt carrier group and charging handle from the upper receiver.
4. Disassemble the Bolt Carrier Group, Including Extractor & Ejector
5. Disassemble the buffer tube assembly
Those are the Steps to field strip or disassemble an AR-15. Below, I will explain each step, using a picture to make the process as simple as possible.
UNLOAD the AR-15.
This is the most critical step; DO NOT SKIP THIS STEP. To verify the AR-15 is completely unloaded and safe to disassemble, first remove the magazine if one is inserted in the gun. Alternatively, verify that there is no magazine in the gun.
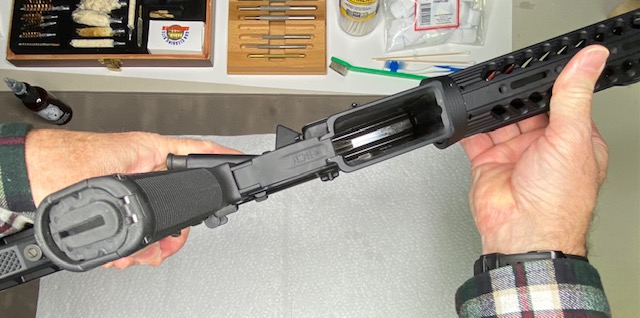
Pull back the charging handle and look into the chamber to verify that no round is present.
Separate the Upper Receiver from the Lower Receiver.
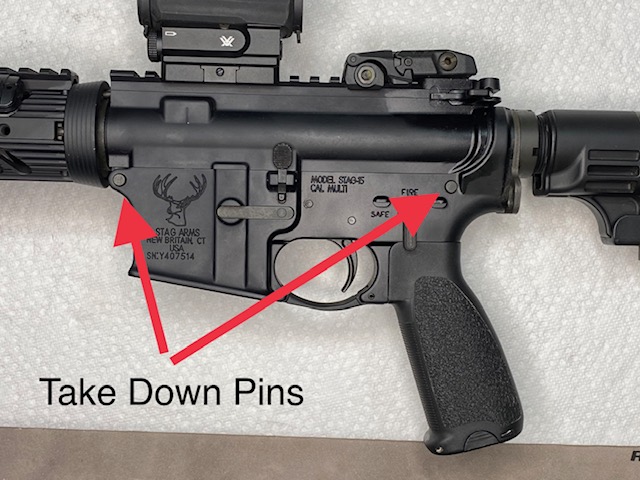
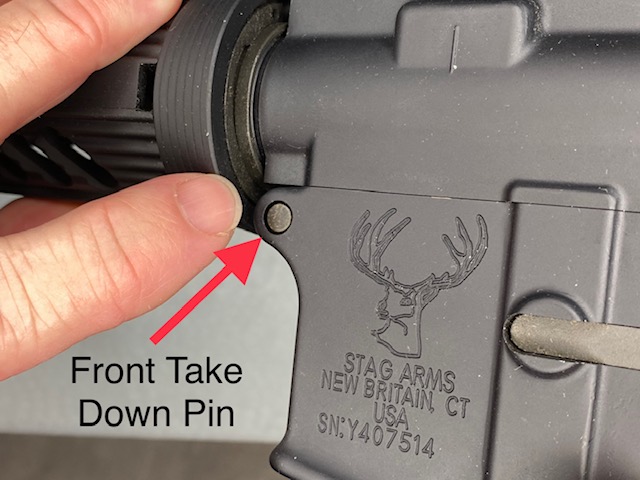
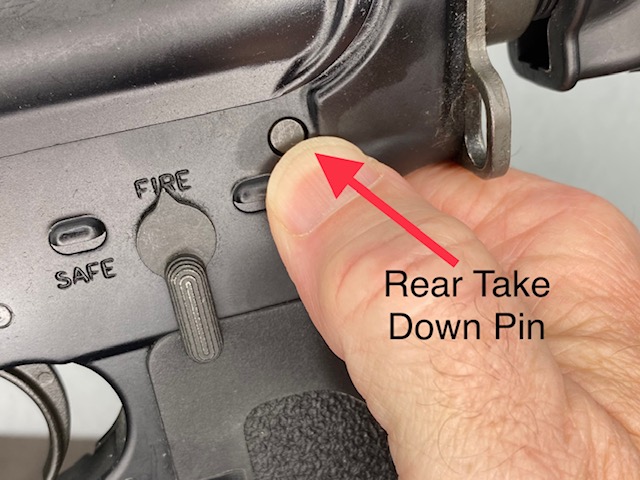
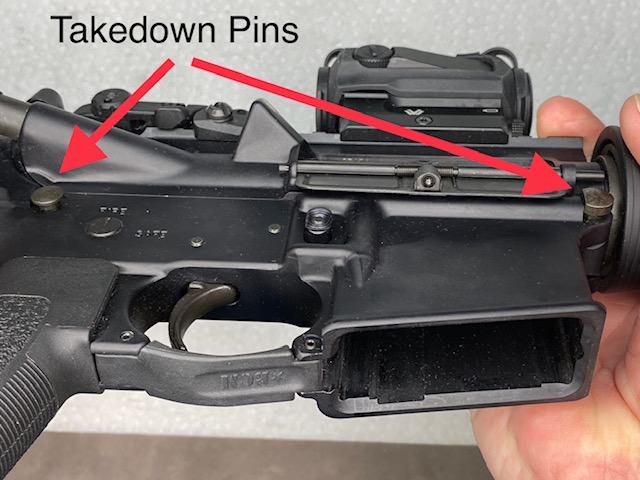
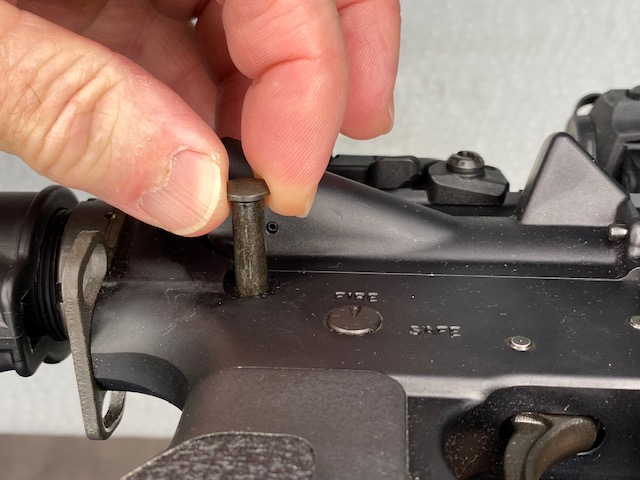
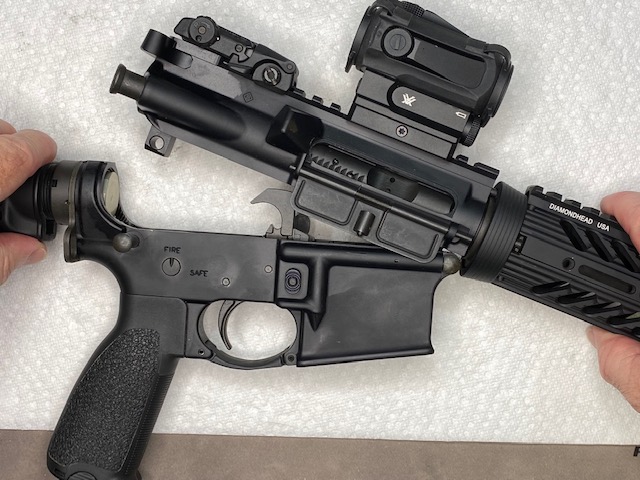
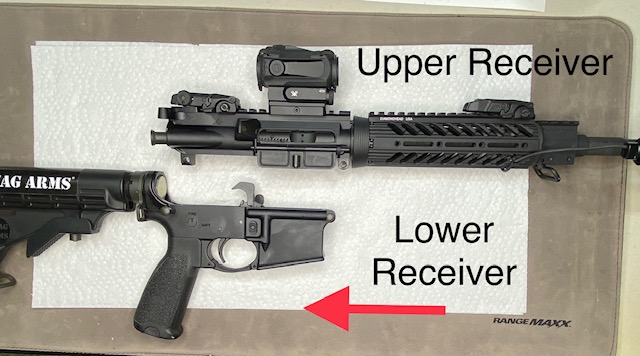
2 take-down pins need to be pulled out. Locate the pins on the left side of the rifle and push them in with your finger. Flip the gun over and pull the pins out from the other side. They will not come out completely, so pull them until they stop.
Remove the bolt carrier group and charging handle from the upper receiver.
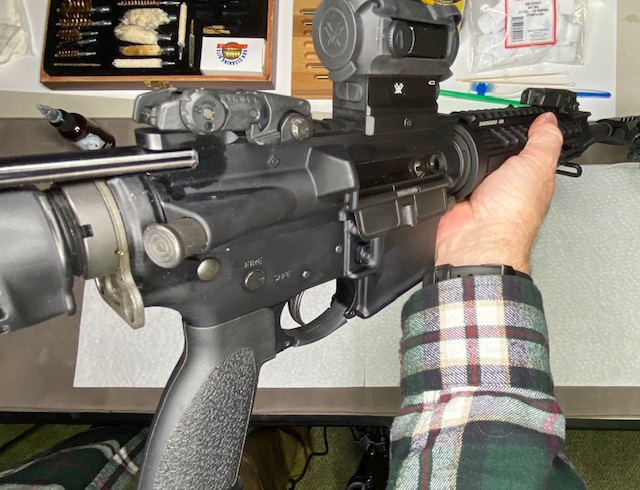
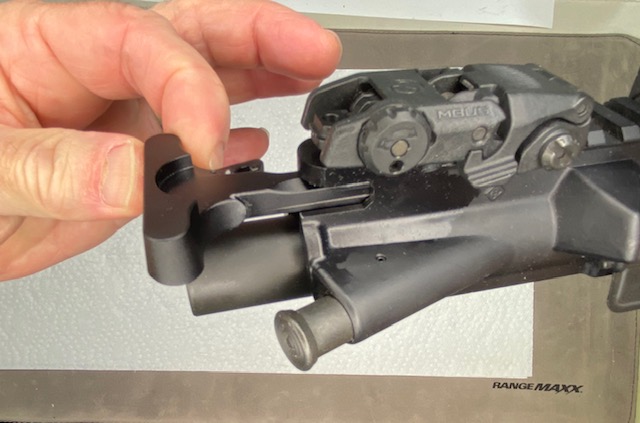
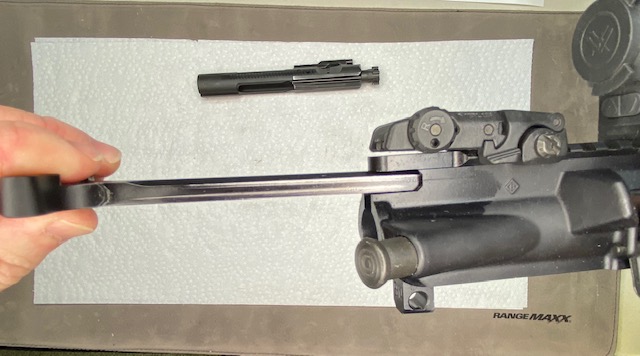
To remove the Charging Handle and the BCG (Bolt Carrier Group) from the Upper Receiver, start by disengaging the Charging Handle latch. Pull the charging handle about halfway out of the Upper Receiver and the BCG will come along with it. Stop halfway and grasp the BCG and carefully pull it all the way out. Then you can remove the charging Handle by lifting it when aligned with the notch.

Disassemble the Bolt Carrier Group, Including Extractor & Ejector
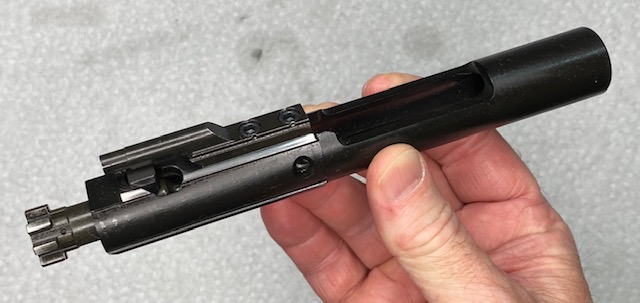
Next, we will completely disassemble the BCG, including the removal of the ejector and extractor. The first step is to remove the Firing Pin Retainer to dislodge the Firing Pin from the BCG. This can be easily done by using a small, pointed object to grab the Retainer and pull it out. Once it is removed, the Firing Pin is free to fall out of the bot Carrier Group.
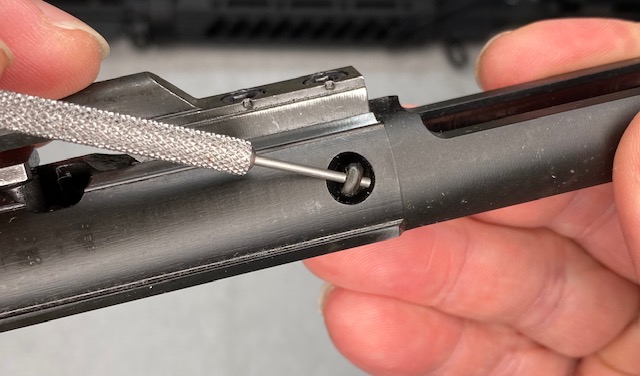
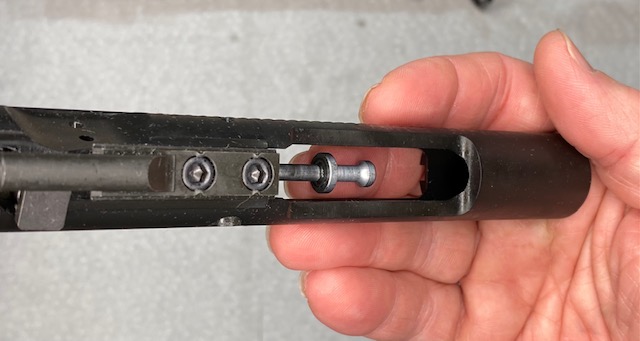
Now it is possible to remove the Cam Pin, which is held in place by the Firing Pin. Once the Cam Pin is removed, the Bolt will come out of the Bolt Carrier. Press the bolt into the Carrier as far as it will go. This allows the Cam Pin the proper clearance to be removed. Rotate the Cam Pin 90 degrees and you can then pull it all the way our of the Bolt Carrier.
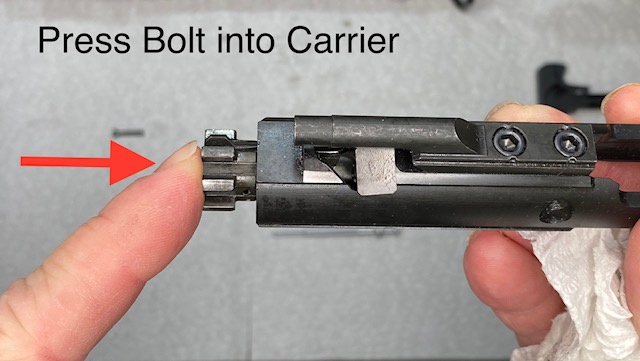
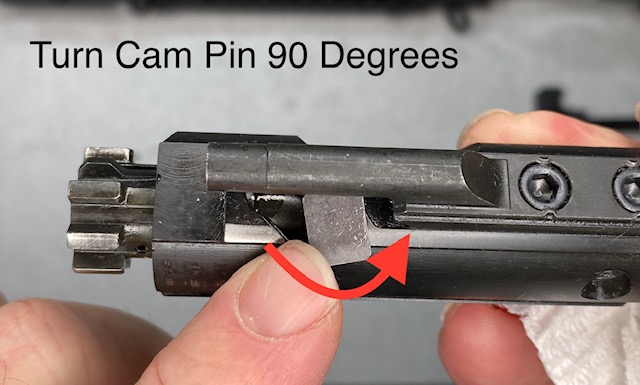
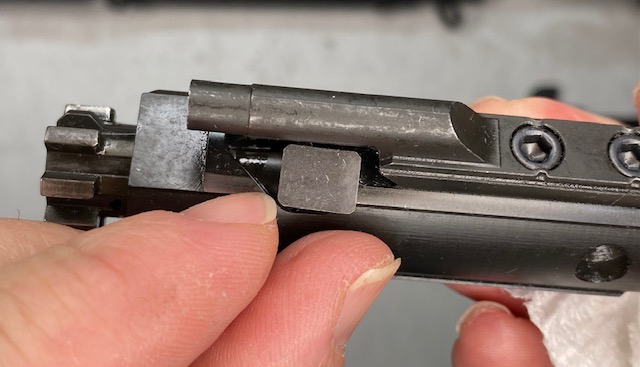
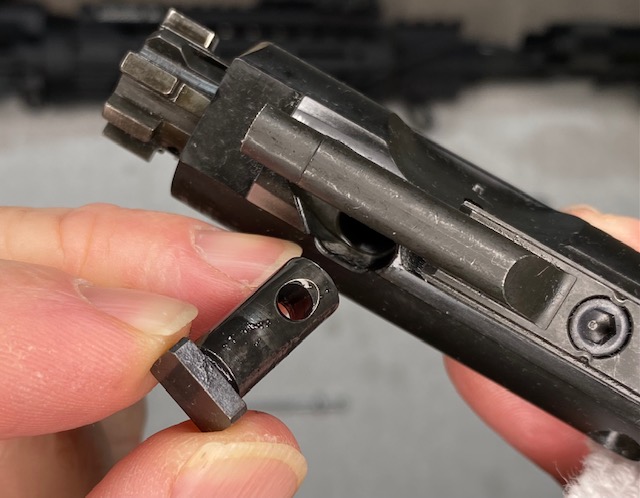
Next, we will remove the Bolt from the Bolt Carrier. With the Cam Pin Removed, the Bolt can be pulled out of the end of the carrier with relative ease.
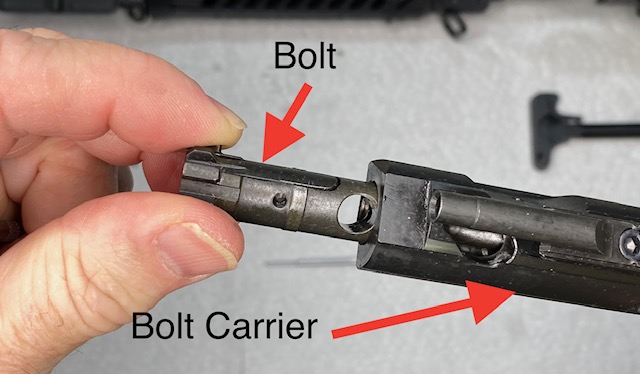
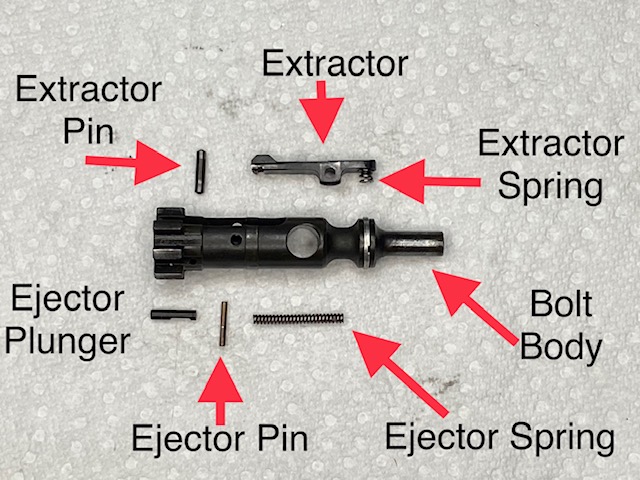
Next we will disassemble the AR-15 Bolt by removing the Extractor and Ejector. See the following article for more details on this process:
How to disassemble an AR-15 BCG (Bolt Carrier Group)
The article will show you in detail how to completely disassemble and reassemble the Bolt.
Disassemble the Buffer Tube assembly
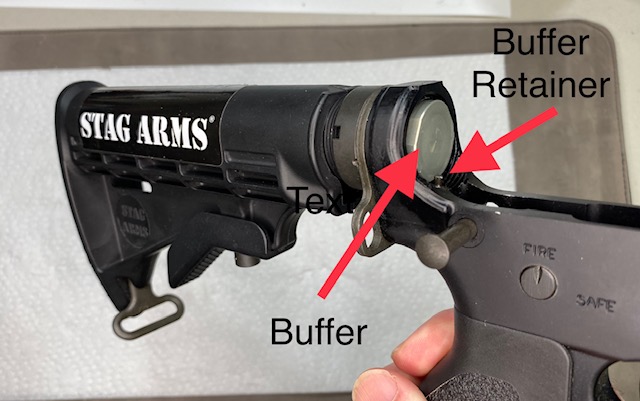
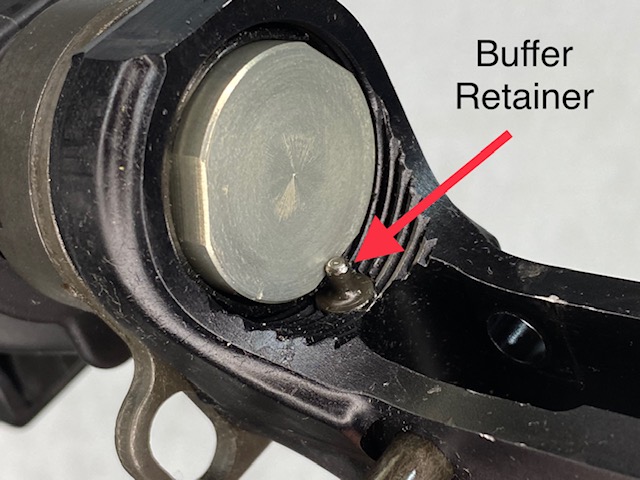
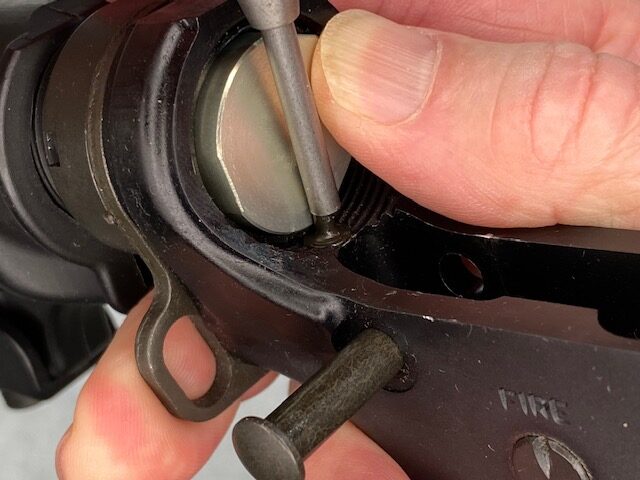
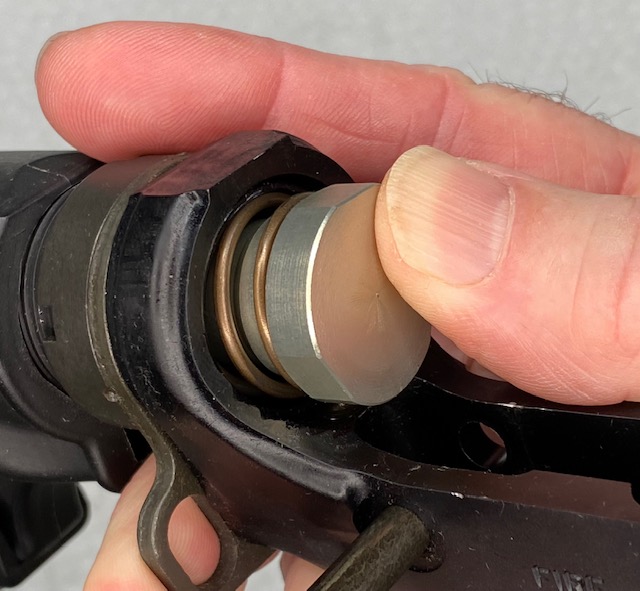
Next we will remove the Buffer and Buffer Spring from the buffer Tube. This is not a critical step and to be honest I rarely ever do this. This part of the AR-15 does not get nearly as dirty as the other parts and will not need cleaning as often. The steps are easy, just locate the retaining pin, depress it with a small screwdriver and allow the spring to push the buffer out enough to grab it. Then carefully pull the spring outward and upward until it is out.
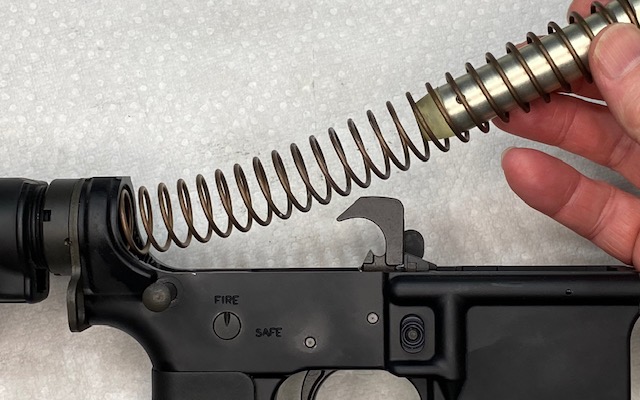
Your AR-15 is now disassembled for cleaning.
Video: How to Disassemble an AR-15
Thanks for reading my article and please feel free to leave a comment or question below!