S&W M&P Shield or Shield EZ 9mm Pistol Disassembly, Cleaning, Lubrication and Reassembly
I am going to show you step-by-step how to disassemble, clean and lubricate a Smith & Wesson M&P 9mm Shield and Shield EZ pistol. From the field stripping to complete reassembly, this tutorial will allow you how to quickly and confidently perform this task in 15-20 minutes.
If you have never tried to take down (field strip) your 9mm Shield or Shield EZ, you will soon see how easy it is to accomplish without even using any tools. The design is excellent so anyone can easily maintain their firearm.
The Shield 9 and Shield EZ are also designed to field strip without having to press the trigger. There are some guns, such as Glocks that require the trigger to be pressed during disassembly, which has resulted in negligent discharges in the past. If you properly unload your gun and double check it before attempting to disassemble and/or clean it, you will not have any issues.
However, pressing the trigger at any time other than when you are on the range, sighted in, is a violation of the second rule of firearm safety. The rule is, “Never put your finger on the trigger until the gun is sighted in on a target and you are ready to shoot.” There are 4 Rules of Firearm Safety you can review.
If you have never tried to take down (field strip) a semiautomatic gun, rest easy as it is not hard or complicated. At least not the Smith & Wesson Shield.
Differences in Disassembly between M&P Shield 9mm models
There are more than a dozen different versions of the M&P Shield. The differences are in the features that come with the gun. Some have external safeties, some do not. The Shield EZ has a grip safety but the Standard Shield does not.
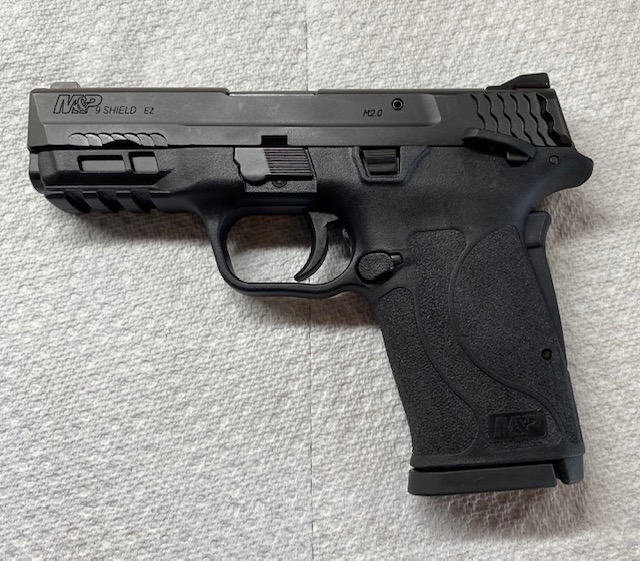
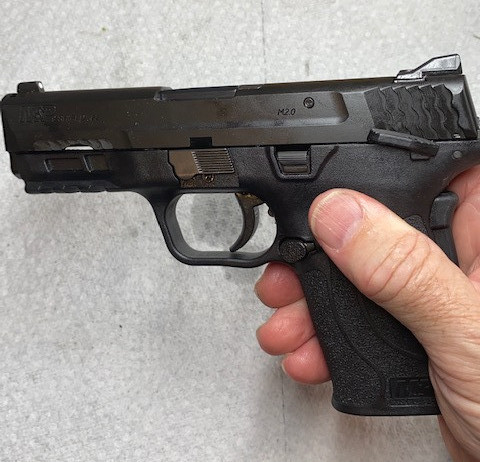
Also, there is a Shield 2.0 model, which is what you will see in the picture. This newer version has a larger external thumb safety lever (if yours has an external safety) than the original Shield. This does not change the disassembly steps.
Most guns come apart in a similar way, but different manufacturers have different ways to release the slide, and you should always find a tutorial before attempting to remove the slide from an unfamiliar gun for the first time.
S&W Shield Cleaning Supplies
Here are the supplies you will need to complete the disassembly and cleaning of most semi-automatic pistols. There are lots of different cleaning products, so I will list the ones I have used for years of trouble free results. You can also see DIY Gun cleaning station.
Brownells also carries all the products you need to clean your handgun. Check them out here: Handgun Cleaning supplies.
- Micro fiber cloth or paper towels
- Cotton swabs or lint-free swabs
- Hoppes Boresnake or equivalent (this will save you time and effort)
- Real Avid Bore Boss (New Style Bore Snake)
- Rod and Patches Style Cleaning Kit (if you do not have a Boresnake)
- Hoppes No. 9 Gun Bore Cleaner
- Original Gun Oil (Use Discount code SAVEWITHDAVE for 10% off and FREE shipping) See my review article Best Gun Oil Review.
- Small screwdriver
- Gun Scrubber Synthetic Safe cleaning aerosol spray
- Soft bristle gun brush or toothbrush
S&W M&P Shield or Shield EZ 9mm Pistol Disassembly, Cleaning, Lubrication and Reassembly Video
Steps to Field Strip (disassemble) the S&W Shield or Shield EZ 9mm pistol
Engage the external thumb safety (if present).
If your model has a manual thumb safety, place it in the “safe” position (up).

Unload the gun
This is the most important step. Eject any magazine that is in the gun by pressing the magazine release button, and then remove the round in the chamber. Be sure to do it in that order! Magazine first, then empty the chamber! Remove any and all ammo from the area.

Repeat Step 1. Verify the gun is completely unloaded
This step is here in case you skipped step number one.

Remove the slide, the barrel, the recoil spring and the guide rod
Lock the slide to the rear by pulling the slide all the way back while pushing up on the slide stop lever. Check again at this point to be sure there is no ammunition in the gun.
Video: How to clean a M&P Shield EZ

Rotate the take-down lever clockwise from the 3 o’clock position to the 6 o’clock position.

Pull the slide rearward which will release the Slide Stop lever and slowly allow the slide to move forward and off of the front of the gun frame. Do not press the grip safety while removing the slide.


Turn the slide upside down and Depress the Guide Rod Toward the Front of the Slide to release from the barrel. Carefully lift the guide rod and recoil spring out of the slide.

Remove the barrel from the slide.

That’s it for the disassembly of the Smith & Wesson Shield 9mm. This is as far as you need to go to give the gun a good cleaning, or to replace the recoil spring. Let’s move on to cleaning instructions.

How to clean the Smith & Wesson M&P Shield 9mm EZ Pistol
Clean barrel and guide rod
You can clean the inside of the barrel in one of two ways:
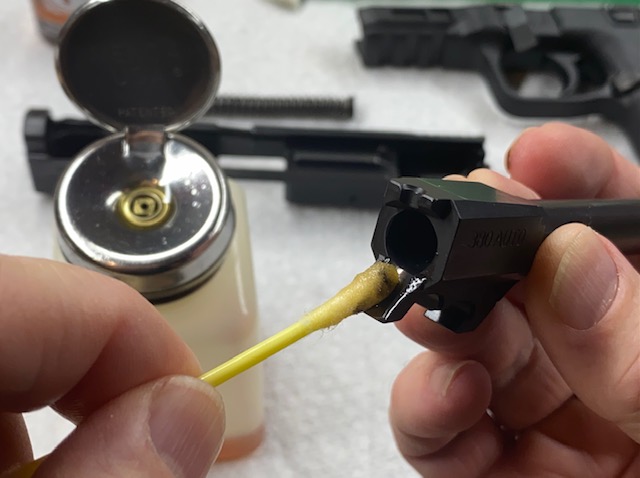
1. Run a Boresnake through the barrel several times. For extremely dirty barrels, apply some Hoppes No. 9 solvent to the inside of the barrel with Q-tips and let it sit for a few minutes before running the boresnake through.

2. Using a pistol rod and cloth patches. Wet the patches with Hoppes No. 9 gun cleaning solvent or equivalent and using the rod, push wet patches through the barrel until they come out clean. Depending on how dirty the barrel is, you may need a lot of patches.


Clean the feed ramp of the barrel with Hoppes No. 9 solvent. Be sure the barrel and feed ramp are nice and clean.

Use Hoppes Number 9 solvent & a rag or spray with Birchwood Gun Scrubber to clean the recoil spring and guide rod assembly. Wipe any remaining solvent off with a micro fiber cloth or paper towel.

Clean the gun frame
Use Hoppes #9 solvent and a paper towel or cotton swabs to clean all surfaces of the frame, especially the rails where the slide contacts the frame. On the M&P Shield and other guns that have a polymer (plastic) frame, do not get Hoppes No. 9 solvent on parts that are not metal.

The fastest, most thorough way to clean a polymer frame is to spray it down with Birchwood Casey Synthetic-Safe Gun Scrubber or equivalent. After using either cleaner, use a micro fiber cloth or rag to wipe any excess solvent off of the frame.

Clean the Slide
Use Hoppes No. 9 solvent and a cotton swab or paper towel to clean all surfaces on the inside of the slide, especially the areas that contact the frame rails during operation.

Wipe the slide down to remove the dirt and solvent.

Once all the parts are clean, we need to lubricate the moving parts with Original gun Oil or other quality gun lubricant.
Shield 9mm Lubrication
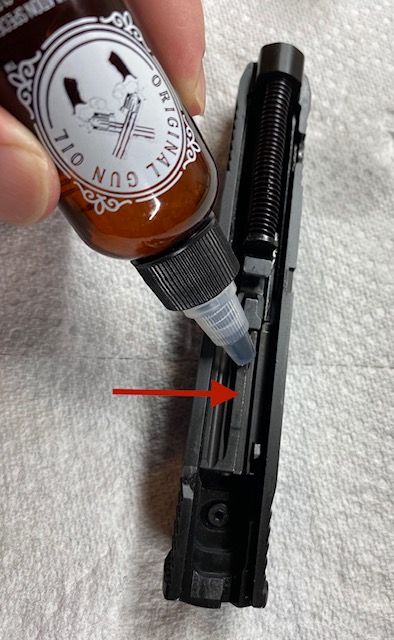
Using a quality lubricant such as Original Gun Oil or Slip 2000, apply just a drop or two to the following areas:
Frame Lubrication:
4 Rails, 2 per side as shown
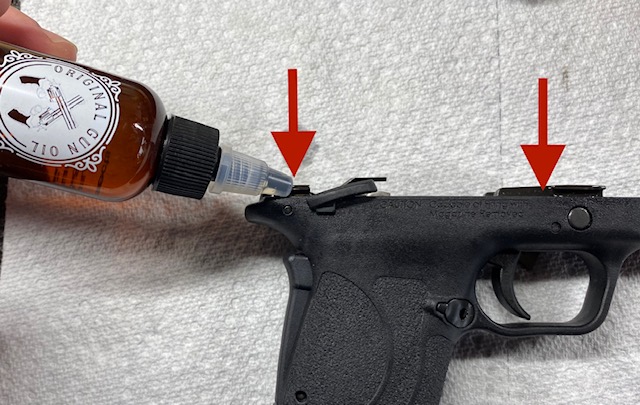
Hammer Pivot area
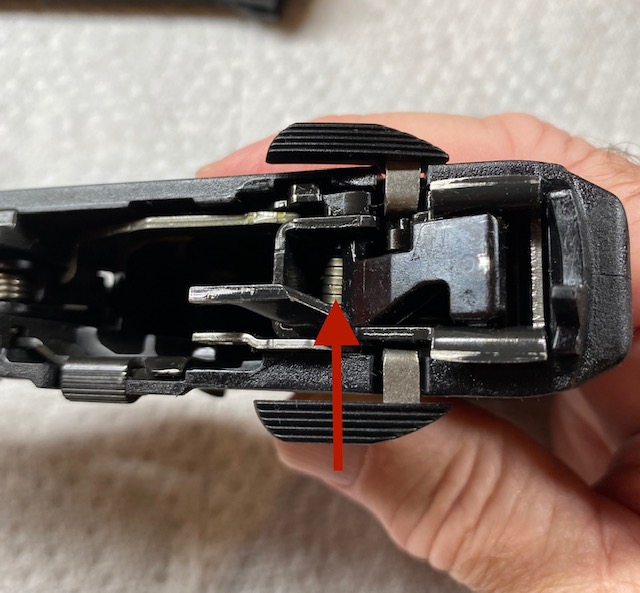
Slide Lubrication:
Hammer cocking surface
No need for more than a drop or two. The oil will move around on its own and coat the necessary surfaces.
Reassembly of the M&P Shield 9mm EZ Pistol
This part is very simple once you do it a few times.
Install the Barrel and recoil spring into the slide
Set the slide upside down and put the barrel into the slide.

Then place the recoil spring assembly on top and press on the end so it fits in the groove on the barrel as shown in the picture.

It should look like this:

Install the slide on the frame.
Then line up the slide with the frame and slide it on.

Continue to push the slide rearward, being careful not to depress the grip safety lever on the back of the grip. If you have already pushed the slide on your Shield EZ while depressing the grip safety and the slide is now stuck, DO NOT WORRY! Go to the bottom of this article or click here for the video: How to fix the stuck slide on your Shield EZ 9mm.

Push the slide all the way back and engage the slide stop lever by pressing upwards until it lock the slide in place.

Rotate the take down lever counter-clockwise to the 3 o’clock position it was in at the beginning.

Push the slide all the way to the rear and the slide stop will disengage.

Allow the slide to move forward into the closed position.
Work the slide back and forth several times to be sure it operates properly, and to allow the lube to spread into all the areas that move

Wipe down the outside of the gun with a micro fiber cloth or other soft cloth to remove excess oil and fingerprints.
Ok, you are all done! That was a lot of steps but they are easy and you will fly through next time!
Lastly, you can test the functionality of the gun by taking some dummy rounds and loading the gun with them. Now make sure a round is ejected every time to rack the slide to the rear. The gun is now fully assembled and ready for another day at the range!
M & P Shield EZ Function and Safety check Video
Here is a quick tutorial on how to check the function and safety features of your Shield EZ 9mm or .380.
Stuck Slide on Shield EZ 9mm: Easy Video Fix
If your Shield EZ Slide got stuck during reassembly, view the following video:
Thanks for letting me walk you through the cleaning and disassembly of your Smith & Wesson M&P Shield 9 EZ. If you have any suggestions, recommendations or other comment, please leave it in the comment section below and I will usually reply within 24 hours.
See article: How to Disassemble & Clean an AR-15 rifle
This is hands down the best video I found for cleaning my ez. He took his time and did a very thorough job of explaining each step. This was great for a beginner.
Michael, thank you for the nice comment! I am glad to help people, especially beginners. I remember when I went to clean my first gun many years ago. I was concerned that I would not put it back together correctly and was glad to find help on Youtube! Enjoy your Shield EZ, it is a fine gun.
Dave
Thank you so much for this great information! As a beginner, the photos and the slow going helped me a lot. Thank you.
Marilyn, thanks for the comment. I am glad it helped!
Dave
I’m a new M&P Shield EZ owner, and I’m so glad I found this video first, before wasting a lot of time on pages that skip steps, have bad lighting, non-English speaking presenters, or they assume you’re already familiar with the product. Best beginners’ video ever! I wish everyone would do how-to videos as clearly and concisely. I already feel confident I can do this!
Andrea,
Congrats on your M&P Shield EZ! I’m sure you will enjoy it, it is a nice gun. Thanks for your nice comment on my video! I tried to make it as clear as possible. I was new once as well and really appreciated good information.
Dave
I am a new Shield M&P EZ owner, bought it to introduce a friend to it. I love your no nonsense step by step tutorial for this gun. I wanted to be familiar with it so I can share the knowledge with my friend. Being familiar with Glocks I needed to see the differences and your tutorial was very clear and concise. Thanks and Great Job!
Chuck,
Thanks for the comment! Good to hear that it was helpful for you. Enjoy your Shield EZ!
Dave