Kimber 1911 Field Strip- Disassembly & Reassembly Instructions
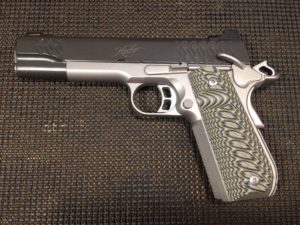
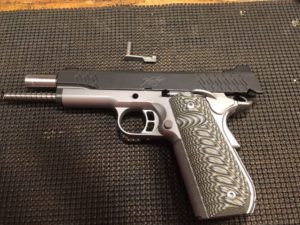
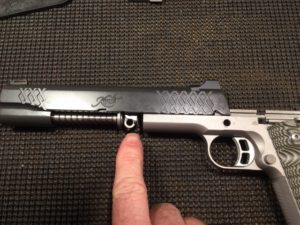
This article will show you step-by-step how to disassemble (Field Strip) and reassemble a Kimber Aegis Elite Custom 1911 Semi-Automatic Pistol in .45 ACP. You will need to know how to perform a 1911 field strip for cleaning purposes. For just the Disassembly, see How to Disassemble a Kimber 1911.
Here is some information on setting up a Homemade Gun Cleaning Station.

Which 1911 models does this Procedure Work For?
This 1911 disassembly and reassembly procedure will work for most, if not all makes and models of 1911 pistols with a 5″ barrel. Some will be referred to as “Government” models. The M1911 pistol is the original designation for the 5″ Government model.
Different Manufacturers may use other names to signify a 5″ full size 1911. For example, Kimber refers to some of their 5″ models as “Custom”, such as Master Carry Custom. The Master Carry Pro will have their 4″ barrel, and the Master Carry Ultra will have a 3″ Barrel.
This 1911 disassembly reassembly field strip procedure will not work for a Kimber model with a “bull barrel”. Most of the 4″ 1911 Models use a different design to lock the barrel to the slide. If you have the 4″ model, see my article Cleaning a Kimber 1911 Pro Carry. or Kimber Pro Carry II Disassembly.
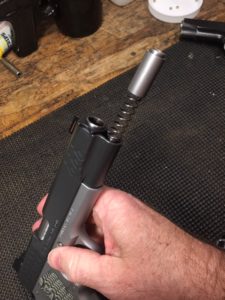
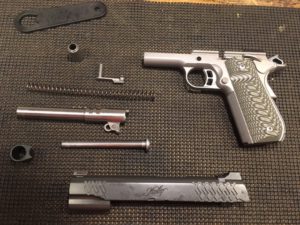
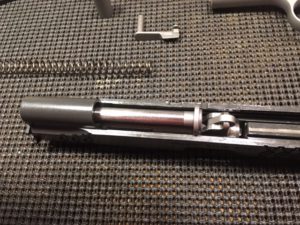
Field stripping is basically removing the slide from the frame, and then removing the recoil spring, guide rod and barrel. Once this is accomplished, these components can then be cleaned and lubed as outlined in my article: Cleaning a Kimber 1911.
The cleaning procedure and products used will certainly work on any 1911, and most other guns as well. Just be aware that if you are going to clean a Glock, Springfield XD series or Smith & Wesson M & P firearm or other gun with “plastic” parts, be sure to use a cleaner designed for that use, such as Birchwood Casey Gun Scrubber Synthetic Safe Cleaner. Some of the more common cleaners are harsh on plastics and polymers.
If this is the first time you are doing this, do not fear! It is not hard if you follow the steps. The next time you do it you will be a pro and will not likely need these instructions. It looks like a lot of steps but I wanted to break it down as far as I could to make it as clear and easy as possible.
1911 Disassembly Tools
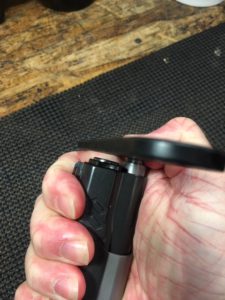
You will need a 1911 barrel bushing wrench for this procedure:
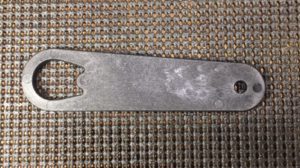

Or a nifty little product I recently purchased called a Real Avid Smart Bench Block which has a built-in barrel bushing wrench. you can check it out here.
Step by step instructions are below, but you can also watch my videos. The first is for the 1911 Field Strip and the second is the reassembly.
1911 Disassembly Video
Here is the reassembly video:
Step by Step Instructions with Pictures: Disassembly-Field Strip a 1911
Here are the steps:
Remove the magazine
Empty the chamber of any rounds
Repeat the last 2 steps. BE SURE THE GUN IS UNLOADED.
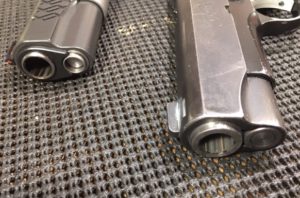
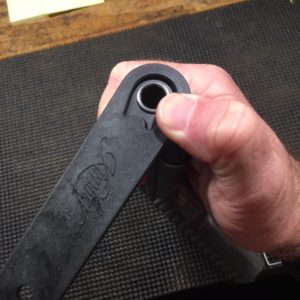
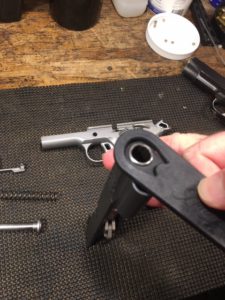
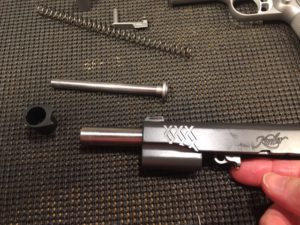
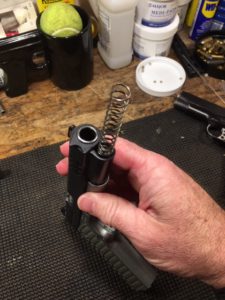
Set the gun on a table or bench with the barrel facing up. Wear eye protection in case the recoil spring launches the plug into your face.

.

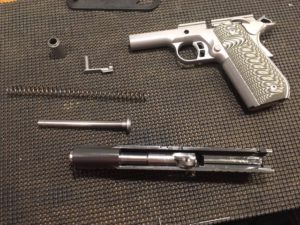
Now you can clean and lubricate each component.
Reassembly Steps with Pictures: 1911 5″ Government Pistol

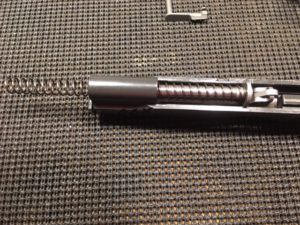
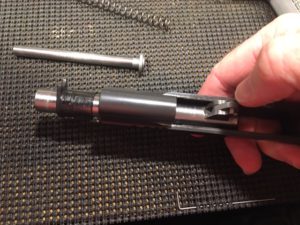
Slide the tighter, smaller end of the recoil spring onto the guide rod and seat it firmly.
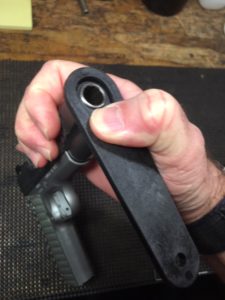
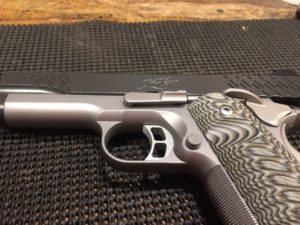
** Be careful here. If you do not line things up as shown, you may scratch your gun when pressing the lever into place.
Congratulations! You’re done reassembling your 1911!
Final Steps
Now work the slide back and forth with your support hand to make sure it feels right and to help the lubricant move into all the moving parts. Then wipe any excess lube off of the gun with a rag or paper towel.
Now be sure to perform a 1911 function and safety check.
If you have some dummy rounds or snap caps, you can use these to test the proper ejection of your firearm without using live ammunition.
You have successfully field stripped and reassembled your 1911. If your gun does not have a barrel bushing, please see Cleaning a Kimber 1911 Pro Carry for instructions on the disassembly on a Kimber with a bull barrel.
Hi, thanks for showing how to reassemble this nice looking Kimber 1911.
When I watch you it doesn’t look that hard but there are still a lot of steps. I think safety is important and cleaning and reassembling and cleaning one’s gun is an important part of the safety measures when handling guns.
It’s great how smooth all the parts come together in this precision weapon.
Stefan, thanks for checking out my article on field stripping a Kimber 1911! I am a big fan of Kimber as they do make a fine weapon. I have had a Kimber Pro Carry for years and it has been through a ton of training and been beat up a bit and still functions flawlessly!
Dave
Stripping and reassembling has always been a hassle for me. But your post is quite explanatory enough but one question is how do I remove the recoil spring? I didn’t get that part well?! It took me months before I could even try stripping not to talk of reassembling a pistol. I get really scared. Thanks for this post.
Have a nice day
Salim, thanks for reading my post on Field Stripping a 1911! The recoil spring will just pull right off the guide rod either before of after you remove the slide from the frame. I will clarify that in the article. Thanks for pointing out that it is not clear!
Dave
Thank you for this informative and step by step post about the Kimber 1911 assemblage. You really explained it in simple terms and and the images really compliment the points and procedure you mentioned above. I will surely share this post with those who will find it more helpful. Thank you.
Clement, thanks for reading and sharing my Field Stripping a Kimber 1911 article!
Dave
I was always intrigued by guns, I really love reading this, so informative and fun! You explained everything so thoroughly, even a dummy like me would understand with no problem. Thanks for this great article with amazing tips! I might buy one soon. Wish me luck!
I am going to share this with my friends too, just in case.
Isaac, thanks for commenting and sharing my post! I am glad you found it informative!
Dave
I must say that this article is very helpful and informative. Some people say that it is pretty easy to reassemble a pistol, especially this one but I found it to be a little difficult for me. You helped me a lot and I will definitely bookmark you as I can’t wait to see more of your topics.
Daniel, thanks for reading and leaving a comment on my Field stripping a 1911 article. I was apprehensive the first time I had to disassemble my new 1911 for cleaning, afraid I would not get it back together correctly! However, I had a gun dealer show me how to do it and then I was fine. It is not nearly as hard as it looks once you do it yourself.
Dave
thank you very much
I hope my article helped you out!
Dave
Hi Dave,
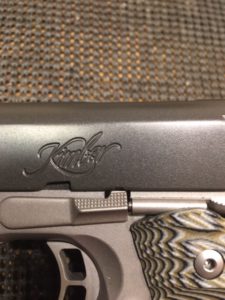
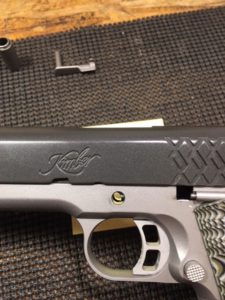
I have a Kimber Camp Guard in 10mm that looks very similar to the gun you use in your demo. I am getting stuck at the slide stop pin removal step. For a little background, I also have a Colt 1911 that I can easily disassemble/reassemble. I have never had an issue with it. However, with this Kimber I cannot get the slide stop pin out. I have done everything you’ve explained, but it won’t come out. I have the smaller semi-circular notch (closest to the hammer) lined up exactly like you do, but when I push the pin from the other side of the gun it won’t budge. I have used a small wooden dowel to add more force, but it does nothing.
This is so frustrating as I have several other pistols (Colt, CZ, SigSauer) and they’re all so easy to disassemble, but this gun just won’t cooperate.
I appreciate any help you can offer!
Thank you,
Carson
Carson, thanks for the comment and question! I am not sure what the problem is there. That pin should come right out. does the gun have the same recoil spring assembly as in the video, and has the pressure from the recoil spring been removed? Is there any chance the pin got bent somehow?
Carson, try getting a drop of oil in there and see if that helps. From what I can see with my Kimber, there really isn’t anything that could be causing that other than a tight fit, bent pin or pressure on the pin from the side.