How to Disassemble a Kimber Pro Carry 2, Pro Raptor II, Aegis Elite Pro or Ultra Carry 1911 pistol
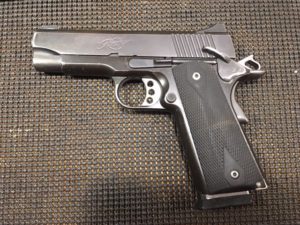
This article will tell and show you all you need to know about the Kimber Pro Carry 2 disassembly and take down procedure for cleaning purposes, or to replace the recoil spring. The method also works for all Kimber Pro models and Ultra Series pistols.
1911 disassembly video is at the end of this article.
The Kimber Pro Carry II is a 1911 with a 4″ “bull” barrel. The bull barrel is a different design form a standard 1911 in that it does not use a barrel bushing to hold it firmly in the slide.
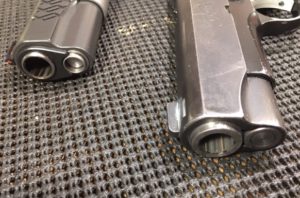
The following Kimber models all disassemble the same way:
- Pro CDP
- Pro TLE II
- Pro Raptor II
- Aegis Elite Pro
- Pro TLE II
- Master Carry Pro
- Covert Pro
The guide rod and recoil spring assembly is a little different on the Kimber Ultra pistols, but the disassembly steps are the same. The recoil spring is a bit tighter and slightly harder to work with, but you will be able to get it done.
___________________________________________
Here is the CALIBER DEBATE VIDEO:
____________________________________________
If you have a full size 5″ barrel with a barrel bushing at the muzzle, there is a different procedure for taking it apart. See my tutorial here:
How to Disassemble a Kimber 1911- 5″ Barrel Custom Models
Disassembly Tools
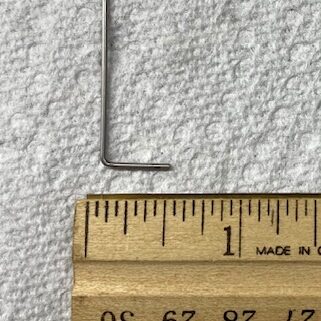
There is only one tool you will need to field strip this 1911. It is called a “take down” tool and it is basically a bent piece of steel resembling a small allen key. If you do not have one, a paper clip will work, but be sure you bend it the same way as the tool so it fits properly. I do recommend getting the tool Kimber Take Down Tool Here if you don’t have it.
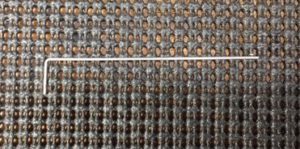
Update: I recently discovered the this tool is very hard to find. A lot of places that carry it are out of stock, so here are the dimensions so you can make one out of a paper clip. The long side is about 2 3/4″ inches and the more important dimension is the short side, which is 1/2″.
Kimber Pro Carry II Disassembly steps
Below these steps I have included pictures so you cannot possibly do this wrong!
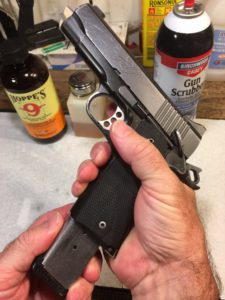
- Remove the magazine and empty the chamber. Remove the magazine first, then remove the round from the chamber if one is in there. Remove all ammo from the area.
- Make sure the gun is unloaded and no ammo is in the immediate area. Many accidents occur during the cleaning of a firearm and I do not want you to be one of them.
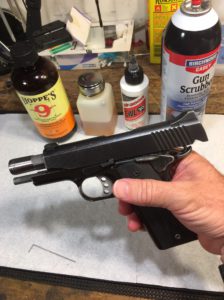
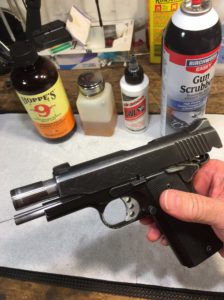
- Lock the slide to the rear using the slide stop.
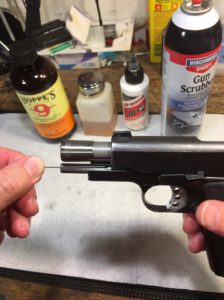
- Insert the short end of the take down tool into the hole in the guide rod that is now visible.
- Now carefully grasp the slide and release the slide lock lever and allow the slide to move forward. It will stop when it hits the take down tool.
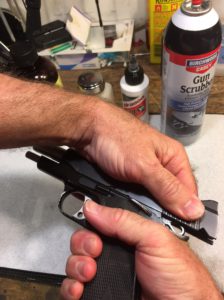
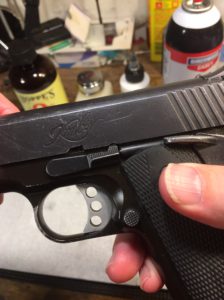
- With the spring tension removed from the slide, it will now move forward and backward easily. Line up the notch in the slide with the end of the slide stop lever.
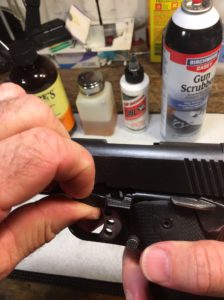
- Press on the other side of the slide stop lever pin on the opposite side of the gun frame. It will start to come out of the gun. Grasp the lever and remove it from the frame.
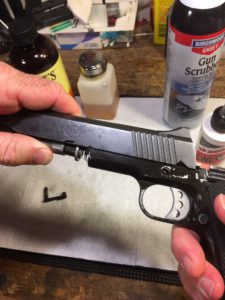
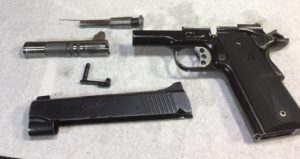
- Now the slide can be remove by sliding it off of the front of the frame of the gun.
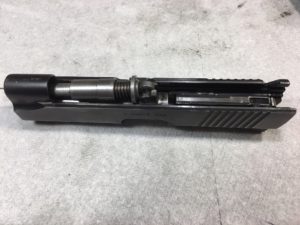
- Place the slide assembly upside down and you can now remove the guide rod and recoil spring together, and the barrel can be removed by sliding it through the front of the slide opening. You will need to flip the barrel lug down to make room.
Here are pictures of each step, and if you scroll down, I have added a video as well.
Kimber Pro Carry II Disassembly Steps with Pictures:
1911 Disassembly video
You have now successfully performed the disassembly of a Kimber Pro Carry II or Ultra Carry 1911 pistol. Please leave a question, comment or suggestion below!
See my tutorial on Cleaning a Kimber 1911.