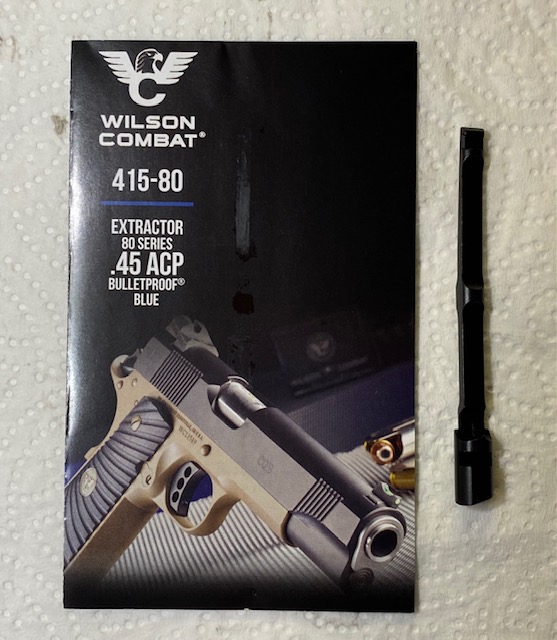
How to Replace a 1911 extractor
In this article I am going to show you step-by-step how to disassemble the slide to remove and replace the extractor in a 1911 Kimber Pro Carry II semi-automatic pistol. I will first discuss the tools you will need, which are few. We will also clean the extractor channel in the slide.
This tutorial addresses an internal extractor. If your firearm has an external extractor, the procedure will be different.
I have purchased a Wilson Combat extractor from Brownell’s because my extractor needs to be replaced due to erratic ejection of brass from the gun. For the most part, my Kimber 1911 works great. However, sometimes the ejected brass hits me in the face and forehead, which is not horrible, but it is also not the way it should work.
___________________________________________________
Here is the CALIBER DEBATE VIDEO:
____________________________________________________
I will show you the pictures as well as a video on how to perform this task. If you have never done it before, you will find that it is not as difficult as you may think. Follow along with me and we can do this together. If you have questions, leave them in the comments section at the end of the article.
What is an extractor?
The extractor in a semi-automatic firearm is one of the most critical components necessary to make the gun run as it should. The extractor is a part of the slide assembly that is responsible for pulling the empty brass out of the chamber and ejecting it from the gun with the help of the ejector. This action occurs each time the gun is fired.
The extractor engages and “grabs on” to the rim at the back of a cartridge. When the gun is fired, the slide moves backward due to the energy from the expanding gases, and pulls the empty brass casing out of the barrel. The extractor has a grip on one side of the rim, pulling the brass along until the other side slams into the ejector. This action causes the empty brass to be catapulted from the gun through the ejection port in the slide.
All of this happens very quickly, and in order to work correctly, all the components must work flawlessly to prevent the gun from malfunctioning or jamming.
What is the difference between an extractor and ejector?
The ejector and the extractor are sometimes confused because the two words are similar. However, they are two very different components that help to perform the same objective of removing the empty brass from the gun so the next round can be loaded.
The extractor is located within the slide and moves with the slide as the gun cycles. The ejector is part of the frame, lined up in such a way as to push the empty brass casing out of the ejection port when the extractor and slide forcefully slam the brass into it.
Internal vs External Extractor
The original M1911 design uses an internal extractor, just like the one we are going to replace in this article. It fits into the slide via a hole, or channel that is machined into it. An external extractor can be seen on the outside of the slide, and is held in place with a small screw pin that comes in from the top of the slide.
There are lots of opinions about which design is better, but it really comes down to how well a particular gun is designed. Both work well if the firearm is made well and is of high quality.
Internal or external, the extractor still performs the exact same function and must be in proper working order for your gun to cycle properly.
What happens when the extractor is not functioning correctly?
The symptoms of a worn or broken extractor are:
- The gun malfunctions due to Failure To Eject (referred to as FTE). This will typically result in a Type 3 malfunction, which is a round trying to enter the chamber (mouth of the barrel) when there is already a round (empty brass) in there.
- The gun malfunctions due to a “stovepipe”. This is also known as a Type 2 malfunction. The brass is not ejected quickly enough and it gets stuck in the ejection port, stopping the cycling of the slide.
- The empty brass is ejected in random directions at random distances. This includes brass that comes straight out of the gun and hits you in the face or head.
If the tip of the extractor is completely broken off, there is no mechanism to remove the empty cartridge after the gun is fired and the gun will immediately malfunction. You will then need to unload the gun and remove the brass manually.
If your extractor is worn out but not broken, or the tension is wrong, the gun will likely still function, but the brass will be ejected in an erratic pattern. This is what I was experiencing when I decided to replace my extractor. The brass was being ejected all over the place and would often hit me directly in the head.
Replacing the internal extractor on a 1911
First, be sure you have the correct replacement. There are Series 70 and Series 80 models of 1911. you need to get the extractor that is made for your series. the one we will be replacing here is a Series 80 extractor, due to the fact that the Kimber Pro Carry II is a Series 80 1911.
How to determine if a 1911 is Series 70 or 80.
Without getting into the difference between a 1911 Series 70 and 80, I am going to show you how to tell. Take a look at the bottom side of the slide after it has been removed. If you see any kind of button or plunger as shown in this picture, you have a Series 80 1911. This plunger activates an internal safety mechanism. you will need an extractor made for a series 80 1911.

Tools Needed to remove and replace the extractor on a 1911
You really do not need much, and there are things around the house you can use if you do not have the proper tools on hand. there is a tool available that is called an Extractor Removal Tool, but it is really not absolutely necessary. You just need to be very careful not to scratch your gun when using a standard punch to remove it. To remove, clean and replace the extractor, you will need:
- Small punch (You can use anything small and sturdy like a large paper clip)
- Pipe cleaners
- Cotton swabs or gun cleaning swabs
- Original Gun Oil (Use Code SAVEWITHDAVE for 10% off) This is the oil I use in the video.
How to remove the internal extractor on a 1911
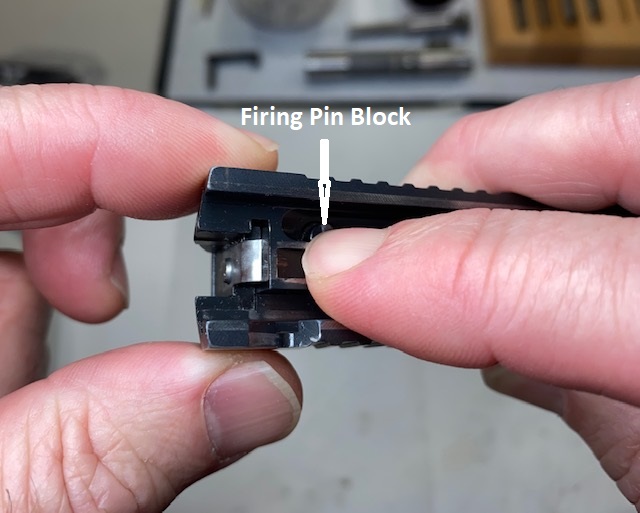
The extractor is held in place by the firing pin stop, so the firing pin stop and firing pin and spring must be removed first.
1. Unload the gun and lock the slide to the rear
2. Field Strip the gun: Remove the slide from the frame. Remove the guide rod, recoil spring assembly and barrel from the slide. Here is a tutorial on this procedure: Kimber Pro Carry II Disassembly.
3. Remove the firing pin stop by depressing the Firing pin block and while holding it, use a punch to push the firing pin into the slide far enough to start sliding the firing pin stop out of the slot. Remove the punch and use it to remove the firing pin stop all the way.
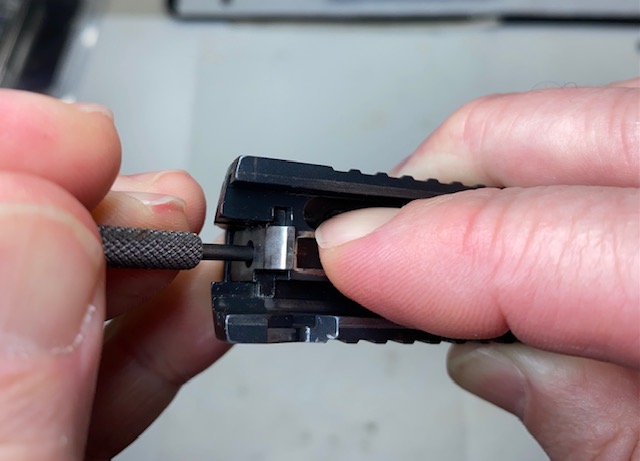
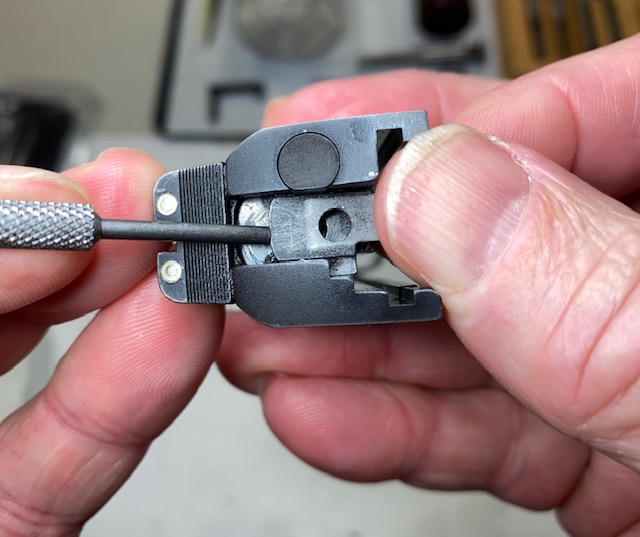
4. While covering the end of the firing pin with your thumb, depress the plunger again and let the firing pin spring eject the firing pin out of the slide.

5. While continuing to depress the plunger, remove the firing pin and spring from the slide.
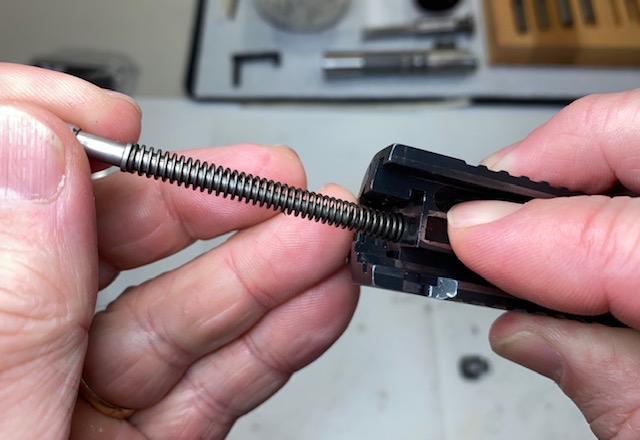
6. Now the extractor can be removed by pushing it out from the inside of the slide. Using a punch, press on the “hook” end just inside the ejection port and push the extractor out of the back of the slide.
How to Clean the 1911 extractor and firing pin tubes
Use some cotton or foam swabs and some gun cleaning solvent or Original Gun Oil to clean the inside of the tubes that house the extractor and firing pin. Use pipe cleaners or equivalent to clean the firing pin tube and opening in the breech face.
How to install a new extractor in the 1911 slide
1. Apply a small amount of Gun Oil to the extractor to make it easier to install and easier to remove for cleaning later.
2. Insert the extractor until it is almost all the way in and then turn it and line the flat side up with the flat side of the opening. Be sure it is as exact as possible.
3. Use the firing pin stop to help you line up the extractor with the slot.
4. Slowly press the extractor into the slide until flush, and firing pin stop will slide completely into the slot.
5. Remove the firing pin stop in order to install the firing pin and firing pin spring.
6. Insert the firing pin and spring by first pressing slightly on the firing pin block until it is almost all the way in, then release the firing pin block to lock the firing pin in place.
7. Lay the slide on a table and start sliding the firing pin stop into the slot. Apply pressure to the end of the firing pin with a punch and then press the firing pin block slightly to allow you to push the firing pin into the slide.
8. While holding the firing pin in place, press on the firing pin stop to partially cover the firing pin, thus holding it in place.
9. Withdraw the punch and then push the firing pin stop all the way in and the firing pin should pop back into place.
Tuning the Extractor
Now that your extractor has been replaced, you can test it by inserting the brass from an empty cartridge and see if it stays in place while slightly shaking the slide. If it does not, you may need to “tune” the extractor by increasing the tension. Here is an excellent article about extractor tuning and tension:
1911 Auto Extractor Adjustment
There is also a tensioning tool available if youwant to get it absolutely perfect: Weigand Combat 1911 Extractor Tensioning Tool.
Reassemble the 1911
If you need help with this, see my video on lubricating and reassembling the Kimber 1911 Pro Carry II.
Be sure to take your 1911 to the firing range to test its performance before you trust it as a concealed carry gun. I would fire several magazines through it to be sure the extractor is working as expected.
1911 Extractor Replacement Video
Final Thoughts on 1911 extractor replacement
Replacing the extractor in a 1911 seems like a difficult task if you are not familiar with the disassembly of a 1911 slide. If you follow the step by step tutorial I have provided and watch the video, you should not experience any issues. It is not as hard as it looks!
Please leave questions or comments below and thanks for checking out my article!
